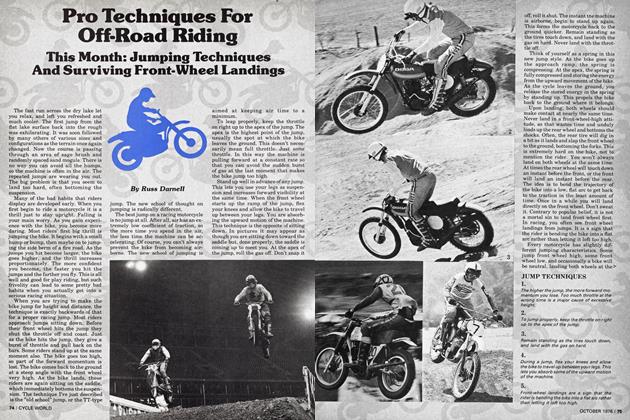
Pro Techniques For Off-Road Riding
Pro Techniques For Off-Road Riding
This Month: Cornering, High-Speed Sections And Rough Riding
Russ Darnell
After our lesson in braking (CW, June ’76), you are more comfortable on fire roads than you have ever been. Using both brakes has increased your confidence, but it is still difficult to get through every turn smoothly. Some corners you cut a fine line through, carrying your speed well, only to find yourself jammed and clumsy in the following section. Sometimes your entrance is good, but your exit is sloppy. There doesn’t seem to be any pattern.
When I teach a motocross school, the second topic I discuss (front brake is first) is what I call “The Dynamics of Cornering.” I teach my students how to turn in a quick pivot, instead of in a long, sweeping arc. During the time I teach turning technique, I stress that motocross races are won in the straights, not the turns. The quicker you turn, the less time the bike is leaned over off the centers of the tires. It is easy to see that the person making the longest straightaways and the fewest corners has a distinct advantage. He has the gas on sooner, and keeps it on longer. The same idea applies directly to desert racing too.
In one respect motocrossers have it easy compared to desert racers. You always know where you are going on a motocross circuit. Motocrossers get an hour or so to practice a course before racing. In that time it is easy to learn the straight lines around the track. Most riders, because of inexperience, still pick the incorrect lines. In the desert, you never know what is around the next bend, or over the next rise. You have no opportunity to practice, and even if you did, it would be impossible to memorize every section. There are some techniques to help the all dirt rider corner more smoothly in spite of not knowing what is ahead.
Most riders take each turn as they come to it, never considering what is beyond. That is wrong. Every turn leads into another turn. Every section leads into another section. Corners, and sections of corners, are never separate. What you do in one turn affects your line through the next. On a fire road, for instance, if you are wrong in the first turn of a series, chances are you will blow it in every succeeding turn.
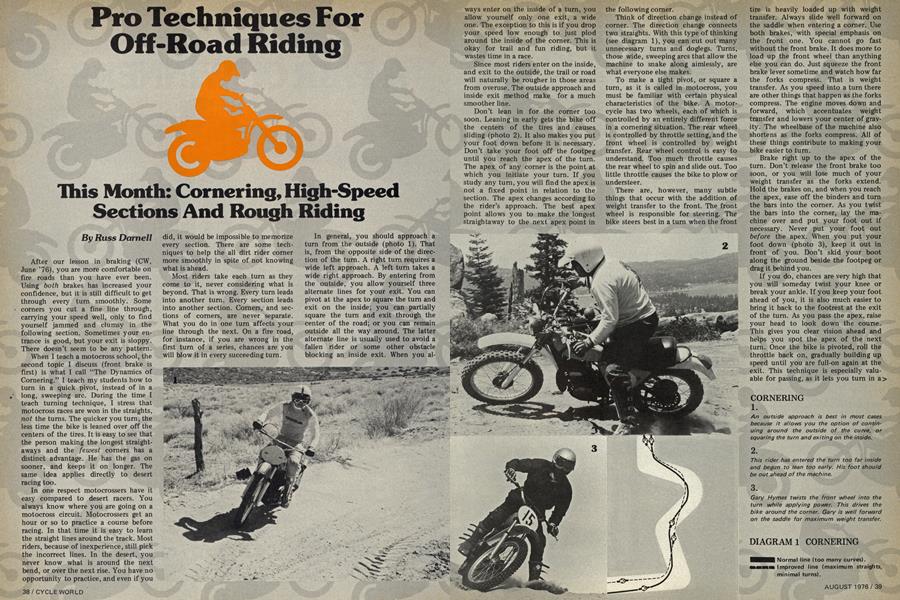
In general, you should approach a turn from the outside (photo 1). That is, from the opposite side of the direction of the turn. A right turn requires a wide left approach. A left turn takes a wide right approach. By entering from the outside, you allow yourself three alternate lines for your exit. You can pivot at the apex to square the tum and exit on the inside; you can partially square the turn and exit through the center of the road; or you can remain outside all the way around. The latter alternate line is usually used to avoid a fallen rider or some other obstacle blocking an inside exit. When you always enter on the inside of a turn, you allow yourself only one exit, a wide one. The exception to this is if you drop your speed low enough to just plod around the inside of the corner. This is okay for trail and fun riding, but it wastes time in a race.
Since most riders enter on the inside, and exit to the outside, the trail or road will naturally be rougher in those areas from overuse. The outside approach and inside exit method make for a much smoother line.
Don’t lean in for the comer too soon. Leaning in early gets the bike off the centers of the tires and causes sliding (photo 2). It also makes you put your foot down before it is necessary. Don’t take your foot off the footpeg until you reach the apex of the turn. The apex of any corner is the point at which you initiate your turn. If you study any turn, you will find the apex is not a fixed point in relation to the section. The apex changes according to the rider’s approach. The best apex point allows you to make the longest straightaway to the next apex point in the following corner.
Think of direction change instead of corner. The direction change connects two straights. With this type of thinking (see diagram 1), you can cut out many unnecessary turns and doglegs. Turns, those wide, sweeping arcs that allow the machine to snake along aimlessly, are what everyone else makes.
To make a tight pivot, or square a turn, as it is called in motocross, you must be familiar with certain physical characteristics of the bike. A motorcycle has two wheels, each of which is controlled by an entirely different force in a cornering situation. The rear wheel is controlled by throttle setting, and the front wheel is controlled by weight transfer. Rear wheel control is easy to understand. Too much throttle causes the rear wheel to spin and slide out. Too little throttle causes the bike to plow or understeer.
There are, however, many subtle things that occur with the addition of weight transfer to the front. The front wheel is responsible for steering. The bike steers best in a turn when the front tire is heavily loaded up with weight transfer. Always slide well forward on the saddle when entering a comer. Use both brakes, with special emphasis on the front one. You cannot go fast without the front brake. It does more to load up the front wheel than anything else you can do. Just squeeze the front brake lever sometime and watch how far the forks compress. That is weight transfer. As you speed into a turn there are other things that happen as the forks compress. The engine moves down and forward, which accentuates weight transfer and lowers your center of gravity. The wheelbase of the machine also shortens as the forks compress. All of these things contribute to making your bike easier to turn.
Brake right up to the apex of the turn. Don’t release the front brake too soon, or you will lose much of your weight transfer as the forks extend. Hold the brakes on, and when you reach the apex, ease off the binders and turn the bars into the corner. As you twist the bars into the corner, lay the machine over and put your foot out if necessary. Never put your foot out before the apex. When you put your foot down (photo 3), keep it out in front of you. Don’t skid your boot along the ground beside the footpeg or drag it behind you.
If you do, chances are very high that you will someday twist your knee or break your ankle. If you keep your foot ahead of you, it is also much easier to bring it back to the footrest at the exit of the turn. As you pass the apex, raise your head to look down the course. This gives you clear vision ahead and helps you spot the apex of the next turn. Once the bike is pivoted, roll the throttle back on, gradually building up speed until you are full-on again at the exit. This technique is especially valuable for passing, as it lets you turn in a> shorter space and get the gas back on much sooner.
CORNERING
To make your exit cleaner, always shift your weight forward as you roll the throttle back on. This keeps the front wheel loaded up and prevents wheelies. To keep the rear tire from breaking loose at the exit, really concentrate your body weight on the outside (of the turn) footpeg (photo 4). This imparts a twisting force to the chassis and flattens the rear tire out slightly for better traction.
Often a fire road will have a built up edge or berm that can be helpful in turning. A berm lets you lean the bike over much farther than you normally would on flat ground. The more you lean, the quicker the machine will change direction. If you accomplish most of your direction change on the berm itself, it cuts the time you have the cycle leaned over off the centers of the tires. When you tip the bike into a berm the tires stay on their centers because of the angle of the bank (photo 5). Don’t take your foot off the peg until the bike is actually leaning on the berm. At the apex, twist the bars into the turn, lean your upper body forward, and roll the throttle back on. The braking sequence approaching a berm or banked turn is the same as on the flat.
On a fast fire road or trail, you can often ride the bordering banks or berms without shutting off at all as long as you can see far ahead. Try to keep your feet on the pegs all the time. It will be necessary to put a foot out for comers, but most riders have their feet off the pegs about 75 percent too often. When you are just going out to practice or fun ride, see how far you can go without putting a foot down at all. Pretend you are in a fast trials event in which they penalize you for dropping a foot. This sort of feet-on-the-pegs practice is extremely valuable. It improves coordination, timing and confidence. It will also break you of your bad habit of dragging a foot so much. Watch the best dirt riders and you will see that they all keep their feet on the pegs most of the time. You have much better control of a motorcycle when you have both feet firmly planted on the pegs (photo 6). Whenever I go out to practice on a non-race day at a motocross track, I ride as hard as I can go for 15 or 20 minutes without putting my feet down at all. It really makes a difference.
CORNERING
Here is another important practice technique. Ride along in low or second gear while standing up. Lean all your weight onto one footpeg (photo 7). This will cause the bike to veer in that direction. Now shift your weight to the other peg. The bike veers in that direction. Now ride along keeping a steady speed and shift your weight from side to side, alternating pegs. This will make the bike gently veer from side to side in equal arcs. It will feel as though you are “pedaling” the machine. Remain standing throughout. After you get used to the feeling of the bike moving from side to side, flick the bars into each turn. As you lean left, flick the bars left. Then alternate. Now the bike will veer more sharply. Lay out a slalom course of trash cans or some such thing and practice this technique through the section. The next step is to give a burst of throttle each time you veer. This accentuates the direction change even more. The purpose of this training technique is to teach you to turn the bike quickly through the use of body weight and throttle control. It will help you avoid sudden obstacles like rocks, logs, ledges, or animals running amok. It also allows you to turn without sitting down and sticking your foot out. This technique is great on narrow trails or in woods riding where visibility is low and quarters are cramped.
Here is cornering technique in brief, then (photos 8 and 9). Approach wide to allow a variety of exits. Use both brakes and sit forward on the saddle to promote weight transfer to the front wheel. When you reach the apex, turn the bars into the comer, ease off the brakes, and lean the bike over. Step out with your foot if necessary. As the bike pivots, roll the gas back on to build up speed for the exit onto the next straightaway. Look ahead. Put your foot back on the peg as soon as possible when exiting, and keep your upper body weight forward. Press down with your foot on the outside footpeg to improve traction. Anticipate the next apex.
“Hey, this is getting pretty neat! No more slipping and sliding, no more front wheel wash-out, and it sure was easy to pass those turkeys making the big, round comers.” Because your line is so different from those of the other riders, you’re missing most of the braking bumps entering corners, and all of the acceleration bumps exiting. You seem to be riding smoother, even slower, yet going faster. No, that’s not quite it. You’re not riding slower. It’s just that you are in so much better control that everything is happening slower, and your speed increases accordingly. You’ve got it in your mind now. “The best line has the fewest direction changes and the most straightaways.” Speaking of straightaways, the fire road has suddenly quit curving around, and you can see it straighten out and disappear from sight into a stand of dense trees. There are streaks of dust up ahead reminding you there are still more riders to pass. Get with it!
CORNERING
HIGH-SPEED SECTIONS
Running in top gear down the road is sort of scary. The scenery is whipping by in a blur of peripheral vision. Small rises and dips of the terrain make the road disappear for worrisome seconds. Your body is tense, and you will be glad to get back into the rough where speeds are more moderate.
High-speed running is the most dangerous phase of off-road riding. Things happen so quickly that you can easily get into trouble. Some riders will blast wide open into a dip or over a rise on a road or fast trail. Never out-ride your vision. It doesn’t hurt to slack off the throttle for a moment to check things out. The half second you lose is nothing compared with the eight weeks you lose when you break an arm or leg.
The roughest spots on fire roads are usually found in the bottoms of dips or depressions. Flash floods often wash a rain groove in the base of a dip. If you are surprised by a wash-out at high speed (photo 10), you have a much better chance of clearing the obstacle if you hit it with your weight back, front wheel light, and with the gas on hard. Panic braking will scrub off so much speed you will usually drop right into the ditch.
Always pause at an intersecting road. Road crossings can be fatal. Side traffic is one hazard, but the main hazard is the road crossing itself. If you are on a main road, the bumps from an ancillary road will usually be minor. If, however, you are on the smaller road, the cross-berms will be much more severe (photo 11). If the road crossing occurs on open ground with plenty of side vision, and the ground at the intersection is smooth, you can just hold the throttle open. But remember, you are vulnerable. If you hit a jeep or car with your bike, you’ll be history.
Some roads will be straight and smooth, with plenty of forward and side vision. On these, you can really make time. You can also give your body a break and relax. The rest will do you good. Tension comes from holding on too tightly. This quickly tires you out. When it’s straight and fast there is nothing to worry about, so loosen up on the bike. Hold the bars lightly, relax your muscles, and control the machine with your feet and knees. Keep your eyes moving constantly from side to side so that you don’t become hypnotized by the terrain flashing by. To increase your speed slightly, you can crouch your head down toward the bars. This position is awkward for long distances. Relaxing is more important in a long race, but crouching is effective if you have a straight burst of a half-mile or so.
When overtaking another rider, get out of his wake as far ahead of time as possible. If the road is undulating up and down, wait to pass in a spot where vision is clear. Never pass over a fast rise or into a dip. When vision is good, I pull over to pass a hundred feet or so before I reach the rider I’m chasing. This is done in order to avoid the tire wake. Closure multiplies the velocity of the leading rider’s roostertail. If your speed is 60 miles per hour, and his is 50, the fine sand and grit coming from his rear tire will hit you at around 80 mph! A rock at this speed can rearrange your face. If dust is bad, moving over early will also help to increase your forward vision.
On fast, cross-country trails, the main thing to be prepared for is terrain changes. Stand up as much as possible to increase visibility (photo 12). Washouts can sometimes be spotted ahead of time that way. If the trail skirts a low-lying series of hills, watch out for flash flood ditches opposite the valley mouths. Glance up ahead two or three miles every once in a while to check out the sort of terrain you are approaching. This technique will often give you advance warning of approaching rock patches.
Off-road riding is full of surprises. Sometimes you will break out of the low brush to find yourself on a dry lake. For maximum speed on a dry lake, you can tuck in like a road racer. You can either take a flat crouch, with your head toward the bars and both hands on the grips, or you can tuck in like a halfmiler does with one hand on the fork stanchion. I prefer the latter technique for long runs because it is more relaxing. Crouching puts a strain on your shoulders and neck muscles. To do the half-miler tuck, scoot your rear end back on the seat until you can easily get your chin down on the gas tank. Put your left hand on the fork leg between the upper and lower triple clamps. Tuck your knees and elbows in as close to the machine as possible to cut wind resistance. Then, just relax and let the bike pull. Tucking in efficiently will increase your top speed by around 10 miles an hour. Whatever you do, don't draft another rider across a lake bed. Sure, you’ve seen Richard Petty draft A.J. Foyt at Indy, or maybe you’ve watched Romero draft Kenny Roberts at Ontario, but they’ve done it many times and they know the other guy isn’t going to make a mistake. Going across a dry lake in a desert race, you usually see a bunch of racers stopped with blown engines. Try to imagine what would happen if you were in a tight draft with another rider and he seized. It makes the hair stand up on the back of my neck just to think about it.
HIGH-SPEED SECTIONS
On a long dry lake run you may be worried about seizing your motor. You can usually tell if an engine is getting ready to seize by the sound. Listen for a jingling noise. It’s made by the piston rings getting tight in the cylinder bore. If the noise has just begun you can save the motor by slacking off the throttle slowly. You can also riehen the carb mixture by depressing the float tickle while you’re still moving. On carbs without a float tickle you can use the enrichening lever you use to start the bike in the morning. Make sure you know where the tickler or the enrichening lever is on your bike. You should be able to reach down and find them by feel.
If the engine starts to seize, it will usually give some warning. If not by sound, then by beginning to lose revs. When this happens, grab the clutch and let off the gas. If you grab the clutch soon enough the seizure will be mild. Just coast for a bit, then as the bike begins to slow down, ease the clutch back in with just a little throttle. The motor will usually re-light immediately. Continue at reduced speed. Whenever the engine locks up instantly, without warning, you have burned up the lower end bearing. The only other sort of thing that can stop an engine dead is something loose getting wedged between the piston and the cylinder wall. One common engine failure of this type is the old “broken circlip trick,” usually caused by you. Never reuse piston circlips.
At speed, keep your eyes moving all the time to keep from being fixated by the bright surface of the lake bed. Watch out for sand moguls which occur near the edges of dry lakes. Be conscious of your high speed. Anticipate the end of the high-speed run far before you reach the edge of the lake. I misjudged my speed on a dry lake in the 1968 Stardust 7-11 in Las Vegas and crashed very heavily. My bike was geared for 95 miles an hour and I was peaked out in top gear. I ran like that for about five miles and became so lulled by the speed that I didn’t shut off until I was right up on the edge of the lake bed. The course picked up at the edge of the lake in a rough right-hand turn through some whoop-de-doos. I missed the turn, hit a wash, and crashed my brains out! The crash cost me about 20 minutes of repair time, plus another half hour to clear my head.
Sand washes can also be high-speed sections. When going fast in the sand, sit back on the seat with your arms comfortably flexed at the elbows. As in all other cases,.ride ahead of yourself. Steer with your feet and knees. Don’t over-rev the engine. Too tall a gear will keep you from accelerating hard enough, and will cause the motor to lug. Lugging an engine is just as harmful as over-revving. Lugging in sand will quickly knock out the lower end. Over-revving is usually responsible for piston seizures. Shift often in fast sand to keep the engine pulling in the upper part of the torque curve. In long, straight, sand sections, use full throttle, but back off occasionally to allow the piston to oil up. This prevents seizures and helps to cool the cylinder. If the bike falls off the pipe, you can easily reestablish revs by slipping the clutch. Don’t continually slip the clutch, just pull the lever in for an instant without shutting the throttle off. Lean forward as you do this to help the rear tire break loose. If you have to repeatedly slip the clutch to maintain revs, you’re running in too high a gear. Shift down one cog.
Most riders don’t use their front brakes at all in fast sand washes. You should use it everywhere. The faster you go the quicker you need to stop, and vice versa. You will find it easy to pass other riders in sand going into turns if you use both brakes.
If you ride events such as Baja races or Grands Prix you will occasionally run your machine on pavement. The first thing you will discover on pavement is that your wheels are out of balance and probably “square.” The knobbies will accentuate the lumpy feel, making you anxious to get back onto the dirt. In pavement corners, knobbies will tend to slide, but they are very predictable. Give them half a chance and you won’t slide out. Try to keep your feet on the pegs all the time. A foot out unloads the tires and makes them more prone to slide. Sit right in the center of the saddle and use moderate throttle in turns. Take wide approaches to the turns, and exit to the inside to make long straightaways. Use the full width of the pavement in picking your lines. It is an absolute must to use both brakes.
One Grand Prix I recently rode at Carlsbad Raceway near Oceanside, California, used part of a road race course and part of a drag strip, along with two miles of motocross-type dirt terrain. You came out of the dirt onto a big, wide, asphalt left-hander which led up to the drag strip. Another left-hander, a 90-degree job, dumped you onto the main straight for about a quarter-mile. I hit the main chute already in top gear, and since my bike was geared for 78 miles an hour, I was peaked out about halfway down. I used the hand-on-thefork-leg tuck-in position. At the end of the straight, a line of traffic cones and haybales directed us back onto the dirt. Many of the dirt riders were shutting off 200 yards too soon! The only riding surface having more traction for knobbies than asphalt is moist adobe, so don’t be afraid to drive deep into pavement turns, especially after you master the front brake. Do all your braking sitting straight up and down on the machine, and lean your upper body into the bars slightly. Don’t begin to lean the bike into the exit onto the dirt until your speed is completely manage able for the loose surface. In situations like Carlsbad, I push especially hard into the turns because there is ample room for run-off if I make a mistake. Plan ahead.
When passing on pavement, out-brak ing your opponent will be best. Try to stay away from other riders going through turns, because most dirt riders are terrible on pavement. They stick their feet out every turn and often get squirrelly or fall. When entering asphalt sections, watch out for loose sand car ried onto the pavement surface by the knobby tires. This creates a super slippery track condition.
The fast fire road you were flying down ended at a checkpoint just before a dry lake. Your tank card was marked, and off you went through the boonies. The trail led right out onto the blinding surface of the lake bed. Aren't you glad you wore smoke-colored lenses today? The dark lenses cut down the reflection, and you can relax as you tuck in. The lake crossing is fairly short, only about a mile. Already you can see beyond the mirage to the rough at the edge of the lake. The moguls signal the approaching end of the flat expanse and you begin to run through flaky, broken mud shards peeling like skin from the sunburned lake. You sit up and begin braking. Down one gear, then stand up to hit the slightly angled bank as you go back into the rough.
ROUGH RIDING
The rough country you're going through is not without beauty. Shale and limestone rock formations are piled everywhere in bizarre shapes. You have only a moment to contemplate your surroundings, then it's back to the business at hand. The ground is hard, which makes the trail even more harsh. The rocks are not always stable; they move around as the tires hit them. The trail crosses many little canyons, some of which are just over-grown cracks caused by rain. It seems as though the bottom of every ditch is square, and you can't keep the forks from bottom ing. The last several miles you have been running in second and third gears for the most part, picking your way through rocks and cross-ledges. The occasional sand wash is no picnic either. These sand stretches are invariably con fined by the low, rock outcroppings, so the usable portions of the trail are worn extremely rough by the passage of so many riders.
Harsh, rocky terrain is best coped with by standing on the pegs, and picking your way through in the fashion of a fast trials (photo 13). Some sec tions are just slow-going, so don't get uptight about your speed. If you try to force the machine through the nasty rough, you will probably crash, or de stroy the rims and tires. If you think the terrain is bad now, try it with a flat front tire (photo 14)! Keep your eyes moving all the time. Since your speed is moderate, you don't have to look so far ahead. Survey the ground about a hun dred feet ahead or so. Run your eyes out to a point ahead, then back in to just ahead of the bike. Watch for alter nate trails, especially if you are ap proaching mud holes or large rocks close together. By picking a different trail you may avoid putting a hole in the cases, breaking a chain, or getting stuck (photo 15).
Keep your feet on the pegs all the time, if possible. You have better con trol of the bike with your feet on the pegs. A dangling foot doesn't do much good, and it can get caught on a rock. If you encounter a really bad section of rocks that has to be negotiated in low gear (photo 16), don't hesitate to use your feet to push your way through. When you take your feet off the pegs, make sure you step out ahead of the machine. You have less chance of catch ing your ankle under the footpeg that way. Your feet can be a big help getting the machine through tight places without damage, but keep them on the pegs as much as you can.
Your legs must be in good shape to "fast-trials" through rocks, since the stance requires you to stand about 90 percent of the time. Standing improves your maneuverability of the machine, particularly at slower speeds. When you are sitting, you are more prone to fixating on a target like a big rock. How many times have you seen a rock by the trail, and known you were going to hit it? I mean, some rocks seem to be magnetic with a special attraction for motorcycles. Many rocks have permanent scars from visiting motorcycles. And vice versa. To avoid these magnetic rocks, don’t look directly at them. Look down the trail beyond the cyclecruncher, and your mind will guide you by.
Select a gear that allows brisk acceleration. If you are in too high a gear, the bike may hesitate when you need it to respond quickly. A lower gear will make it easier to recover from kicks the bike will get from loose rocks.
When you go down into a ditch with a square or ledged bottom, you usually bottom the forks. This is because you are braking to slow down, and the weight transfer forward compresses the forks. When you hit the base of the ditch, the forks only have an inch or two of free travel left, so they bottom quite easily. Successive ditches of this type will make your arms feel like rubber bands. Do all your braking before actually dropping down into the ditch. As the front wheel starts down, move your weight way back over the seat and extend your arms (photo 17). Your arms and legs shoiild be slightly flexed to absorb the shock. Roll the throttle on just a tiny bit so that the engine is barely popping. With your weight to the rear and the small amount of throttle, the forks will extend to almost their full travel. The forks will now more easily soak up the bump at the bottom of the ditch. When the front tire hits the opposite bank of the ditch, roll on more throttle, keep your weight back, and pull back on the handlebars at the same time. This will make the front tire climb more easily. Before the rear wheel strikes the bottom of the ditch, shift your weight forward to decrease the load on the shocks.
ROUGH RIDING
Sand whoop-de-doos are hell for most riders. I’ve seen riders so out of control they fall just to get it over with. Then they make a fresh start. More than any other terrain, sand whoop-de-doos take strength. You must be strong enough to stay up on the pegs or you will really take a beating. There are two good methods for traversing sand whoops.
(Continued on page 98)
Continued from page 45
On prolonged sections of whoop-dedoos, the best way is the “three-at-atime” method (see diagram 2). Raise the front wheel on the first bump of a series. As the wheel comes up, accelerate to carry the front tire over the second whoop. By now the front wheel is beginning to come down. As it comes back to the ground, straddle the third bump in the series. Place the front wheel down on the backside of the third bump. This makes for a smooth landing and prepares you for the next series. Immediately lift the front wheel again on the next bump, and repeat the process. This technique prevents you from hitting each bump with both wheels. This means if there are 60 bumps in a row, the front wheel only hits 20. Once you get the rhythm going, you can continue for long stretches with this method. Timing the take-off and landing of the front wheel is the most important factor. Make sure you keep your weight back to make the front wheel light. To maintain your rhythm, keep the throttle setting constant. If your throttle setting keeps changing, or you blip the throttle on each bump, it is impossible to continue rhythmically. This is one of the main reasons that riders have problems in whoop-de-doos.
The other method is more of a motocross trick, but it works great for short bursts of 100 yards or so. It will work for longer distances, but few people can maintain the concentration necessary. This second method is what I call the “hydrofoil” technique (see diagram 3). In this case it should probably be called the “sandofoil” technique instead. Anyway, to utilize this technique you keep the machine flat when going through the bumps. It requires high speed and 100-percent concentration. A hydrofoil boat rises up out of the water as speed increases, until it reaches a point where the waves no longer affect the hull. With the “sandofoil” technique, you do much the same thing on a motorcycle. Stand up very tall to take full advantage of your long-travel legs. Adjust your stance so the bike has a neutral balance. Use a very heavy throttle setting, and keep it constant. Don’t shut off. The faster you go, the higher up the bike will ride in relation to the whoop-de-doos. Instead of having both wheels traveling down into the valleys between each of the whoops, you are now skipping along on just the top one-quarter of the bump height. In effect, the bumps become smaller and wider spaced. Bursts like this of approximately 100 yards are about maximum, because your mind won’t allow much more. Your brain doesn’t believe what you are doing is possible, so you have to slow down again. This technique is very advanced, so work up to it slowly. Try it at a moderate speed and keep the bike level. You will see the wheels are no longer dropping clear down into each bump.
Whether the terrain is rocky and rough, or sandy and rough, you must let the bike do the work for you. It will go through the roughest terrain if only you let it. Stand up tall and let the bike “work” under you. Motorcycles always dance in rough terrain, but they are unbelievably stable as long as they have freedom of movement. If you plant yourself down on the saddle, squeeze the tank with your knees and hold on tight, the bike is not free to move. The cycle will work against you, and the ride certainly won’t be any fun. Your weight perched on the seat will cause the suspension to snub and bounce, because when you sit, you are more or less dead weight. When you are standing, you are part of the bike/rider combination, so you work together with the machine.
Well, you survived that last 10 miles of rough. One crash and quite a few “almosts” really sapped your strength. It’s time to rest and prepare for the jumps ahead. We’ll begin our October installment on just that topic.