Tips And Fixes For Honda's Xr500 And Xr350
Tips and Fixes for Honda’s XR500 and XR350
Ron Griewe
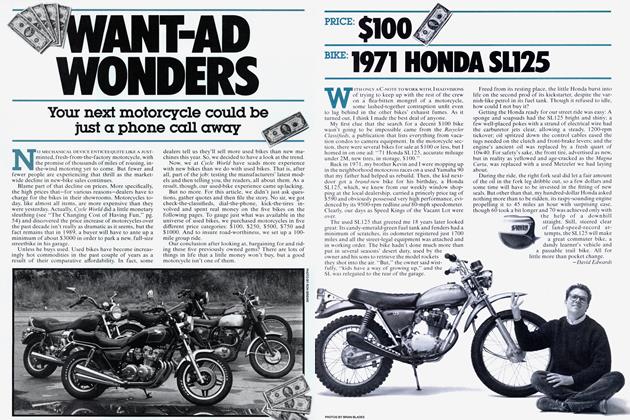
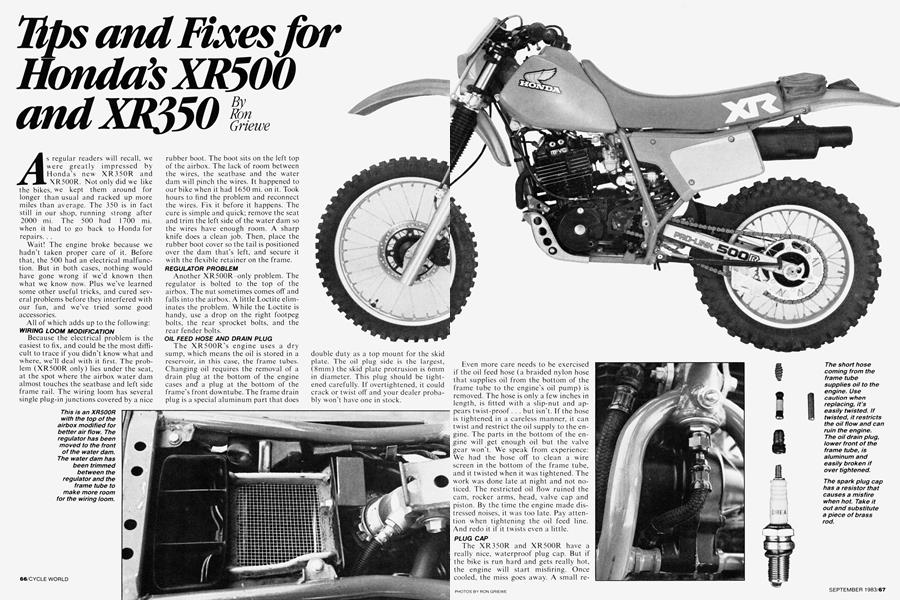
As regular readers will recall, we were greatly impressed by Honda's new XR350R and XR500R. Not only did we like the bikes, we kept them around for longer than usual and racked up more miles than average. The 350 is in fact still in our shop, running strong after 2000 mi. The 500 had 1700 mi. when it had to go back to Honda for repairs. . .
Wait! The engine broke because we hadn’t taken proper care of it. Before that, the 500 had an electrical malfunction. But in both cases, nothing would have gone wrong if we’d known then what we know now. Plus we’ve learned some other useful tricks, and cured several problems before they interfered with our fun, and we’ve tried some good accessories.
All of which adds up to the following:
WIRING LOOM MODIFICATION
Because the electrical problem is the easiest to fix, and could be the most difficult to trace if you didn’t know what and where, we’ll deal with it first. The problem (XR500R only) lies under the seat, at the spot where the airbox water dam almost touches the seatbase and left side frame rail. The wiring loom has several single plug-in junctions covered by a nice
rubber boot. The boot sits on the left top of the airbox. The lack of room between the wires, the seatbase and the water dam will pinch the wires. It happened to our bike when it had 1650 mi. on it. Took hours to find the problem and reconnect the wires. Fix it before it happens. The cure is simple and quick; remove the seat and trim the left side of the water dam so the wires have enough room. A sharp knife does a clean job. Then, place the rubber boot cover so the tail is positioned over the dam that’s left, and secure it with the flexible retainer on the frame.
REGULATOR PROBLEM
Another XR500R -only problem. The regulator is bolted to the top of the airbox. The nut sometimes comes off and falls into the airbox. A little Loctite eliminates the problem. While the Loctite is handy, use a drop on the right footpeg bolts, the rear sprocket bolts, and the rear fender bolts.
OIL FEED HOSE AND DRAIN PLUG
The XR500R's engine uses a dry sump, which means the oil is stored in a reservoir, in this case, the frame tubes. Changing oil requires the removal of a drain plug at the bottom of the engine cases and“ a plug at the bottom of the frame's front downtube. The frame drain plug is a special aluminum part that does
double duty as a top mount for the skid plate. The oil plug side is the largest, (8mm) the skid plate protrusion is 6mm in diameter. This plug should be tightened carefully. If overtightened, it could crack or twist off and your dealer probably won’t have one in stock.
Even more care needs to be exercised if the oil feed hose (a braided nylon hose that supplies oil from the bottom of the frame tube to the engine’s oil pump) is removed. The hose is only a few inches in length, is fitted with a slip-nut and appears twist-proof. . . but isn't. If the hose is tightened in a careless manner, it can twist and restrict the oil supply to the engine. The parts in the bottom of the engine will get enough oil but the valve gear won't. We speak from experience: We had the hose off to clean a wire screen in the bottom of the frame tube, and it twisted when it was tightened. The work was done late at night and not noticed. The restricted oil flow ruined the cam, rocker arms, head, valve cap and piston. By the time the engine made distressed noises, it was too late. Pay attention when tightening the oil feed line. And redo it if it twists even a little.
PLUG CAP
The XR350R and XR500R have a really nice, waterproof plug cap. But if the bike is run hard and gets really hot, the engine will start misfiring. Once cooled, the miss goes away. A small resistor in the cap causes the problem. The resistor’s function is to keep the bike's ignition from messing up TV reception. No one knows why an off-road bike has such a thing. The fix is simple and cheap. Pull the plug cap from the spark plug, take a flat blade screwdriver, poke it inside the plug cap (where the top of the plug usually is) and turn the threaded screw counterclockwise until it falls out of the cap. The resistor will fall out with it. Be careful, there is a small spring above the resistor. Take the resistor to a welding shop. Get a piece of brass rod the same approximate diameter and cut a length % in. long. Replace the spring, brass piece and screw. End of problem.
HEADLIGHT
After a thousand miles or so, the headlight starts to bob around in its plastic housing. The top pivot uses a cotter key for an axle, the bottom is held by an adjustment screw. Take a short night ride and adjust the beam so you can see well. Then remove the headlight/front numberplate, place it face down on a workbench and silicone seal the gap between the lens and the plastic numberplate. Use black or blue silicone. The silicone seal isolates the vibration, stops the shake, extends the bulb’s life and keeps the light from shining back around the gap. If you're going to ride any distance after dark, take the time to duct tape a cardboard bill over the top of the light. It directs the light down where it belongs and keeps it from reflecting into your eyes when you're standing on the pegs.
The XR350R doesn't have the 500’s excellent halogen light but it is possible to install one. We were told it was a simple bulb change. It isn't. The bulb sockets are different. The XR500R headlight housing,-complete with 55w halogen bulb costs $25.46. The Honda code number (the number your dealer orders by) is #142149. The transplant will also require the XR500R regulator, Honda code #142147, which sells for $34.61. The XR350R has a 58w alternator, so powering the halogen is no problem.
GAS TANK PADDING
Tank padding on the XRs is on the thin side. And what little there is sacks after a hundred miles or so. It’s easy to detect; unscrew the two mounting bolts under the front of the tank and see if the brackets fall below the mounts. If so, the weight of the gas, and the rider when forward on the seat, are being supported by the two 6mm screws. Repadding with closed-cell foam will put the weight on the frame’s backbone where it belongs. Be sure to use closed-cell foam that doesn't absorb water. It's easy to determine, just dunk a piece in water if it absorbs water, don’t use it. It'll add weight to the bike and hold dampness around the coil. The thickness of the foam is determined by the foam’s den-
sity. When properly padded, the tank, full of gas, will sit on the frame with the mounting tabs aligned with the frame brackets.
ODDS AND ENDS
These bikes will live longer and be nicer to ride if a couple of small things are adjusted or modified.
The hydraulic line from the master cylinder to the front brake is protected by an outer sheath most of its length. But because the sheath is just an inch or so short, the line can get pushed into a sharp turn as it exits the fitting on the master cylinder. A few wraps with electrical tape will build up this narrow section and remove the potential for stress.
Forks on both machines are harsh and fatiguing on a long ride. Stock settings call for the oil level to be 5.5 in. below the tube tops, with the forks compressed and the springs removed. The bikes are delivered with 10 wt. fork oil.
We got rid of the constant hammering, and helped the front wheels follow bumps at speed, by using equal parts 5 wt. and 10 wt. oil and lowering the level to IVs-in.
The push-pull throttle is a little harder to turn than it needs to be. Friction from the dual cables is the culprit. Remove the top cable, that is, the one exiting the top of the throttle assembly. It’s the push cable and because both carbs have return springs, the push cable isn't needed. Stow the now-surplus cable in the tool bag. It lacks the lock nut the pull cable has, but it will work fine in an emergency.
We added handguards from a 1983 IT490. The left side fits right on, the right side (XR500R) requires some careful cutting and the use of plastic ties. The ties hold it in place since the attaching bolt area has to be cut off to clear the reservoir. Be careful the ties don’t restrict the back of the lever’s movement. Turning the handguards upside down, the longer part to the top, provides better protection from branches and cold wind.
If any oil seepage is noticed around the shiny plugs on the head cap (the ones with alien heads) be sure to tighten them. The plugs hold the rocker arm shafts and they usually loosen after a couple hundred miles.
AIR CLEANER, PIPE, SWING ARM AND TIRES
Although the XRs come with good, dual-density foam air filters, we changed ours. K&N makes cloth filters that work at least as well and they don’t have to be cleaned nearly as often. The K&Ns actually use built-up dirt to aid in the filtering and usually need cleaning only once or twice a year. We also cut a hole in the top of the airbox to increase air flow. Carefully mark the proposed new opening by scribing the plastic with a sharp awl. Then drill a hole at each corner and use a sharp knife to cut the plastic. The 500 has its voltage regulator mounted here. Relocate it at the front edge of the water dam, drilling a new 6mm hole for the stock attaching bolt. Next, silicone seal a piece of Vs inch hardware cloth (available at hardware stores) over the hole. Cut some strips from an old plastic
numberplate and silicone one on each side of the opening. They will keep water from entering from the side.
We talked about the front tire on the XR500R in our test, but it bears repeating; it's junk. The XR350R has a good front tire. Before you ride the 500, or after the 350’s front wears out, replace it with a Metzeler. A 3.00-21 for the mountains, a 3.25-21 for desert. Finding a 17 in. rear tire that fits the swing arm of the new XRs isn’t easy. Most seventeens are too big. Metzeler makes a 4.5017 that fits the XR350R well. Dunlop has a 5.10-17 that’s a perfect fit on the 500. DON’T try to use a 150/80-17 or 5.00-17: Both sizes are too wide and too tall.
Honda spent a lot of time trying to keep the 1983 XRs as light as possible. They dished the heads of most bolts and put holes in gusset plates and even drilled holes in the shift lever. Then they used a strong, but heavy, steel swing arm. American Mugen has a beautiful aluminum arm that weighs 2 lb. less than the XR350R arm, 2.75 lb. less than the
XR500-R arm. It’s a bolt-on part that uses the stock chain rub block and mud guard, although both have to be modified. The aluminum arm is tapered at the rear, uses the stock needle bearings and has an extended rear lip to help ease rear wheel replacement. Like most lightweight parts, it is expensive. The price is $285.
If you're after more horespower, Mugen has a megaphone exhaust system that’s 3 lb. lighter than the stock silencer. It looks different from other megaphones we've seen. It appears to be missing the reverse cone at the end. The cone is inside; the straight rear section contains a silencer. The silencer—which has ceramic packing that lasts longer than fiberglass packing—takes the edge off the exhaust’s bark but the Mugen is still substantially louder than stock. Surprisingly, the megaphone provides a broad power band. Most racing exhausts concentrate the power in a narrow band, but not this one. In fact there is no loss of low-end with it. There is big boost in power every place in the rev range. The big XR500R is competitive with modern 500cc two-strokes with the megaphone, K&N air cleaner and larger #112 main jet. The megaphone price is reasonable at $64.95. American Mugen accessories can be ordered by calling (619) 2445425.
More From This Issue
-
 Up Front
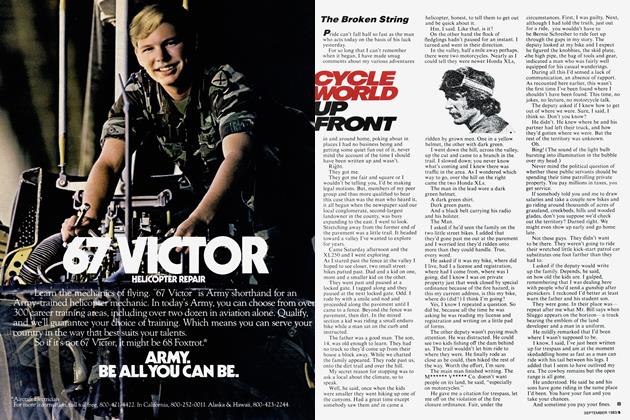
The Broken String
September 1983 -
 Cycle World Letters
Cycle World Letters
September 1983 -
 Cycle World Evaluation
Slip Streamer Windshield
September 1983 -
 Departments
Cycle World Book Reviews
September 1983 -
 Departments
Cycle World Roundup
September 1983 -
 Features
Heartfelt Highways
September 1983