Yer Basic Tire Change
YER BASIC TIRE CHANGE
New Help for the Bald
Peter Egan
If you are clever it is possible to sneak through life without ever changing a motorcycle tire. The rich sometimes get by with frequent trade-ins or by paying someone else to do it. At the other extreme are those of us who, in the early days of minimum wage, avoided the issue by purchasing old bikes that blew up or seized (four-stroke vs. two-stroke) long before tire wear became a problem. That, or by turning a blind eye to visible cord, reasoning that four-ply tires are just reaching their prime with two or three plys left.
Most people change tires because of roadside flats, creeping baldness, or the desire to exchange those brand new factory Never-Grips for a good set of sport tires. Commuters change tires when they have to; touring riders do it about once a, year, generally after the big trip, and racers change tires about as often as most of us take out the garbage or feed the cat. In any case, most of us have to do it sometime. Just like jury duty. So here is a stepby-step tip sheet and guide to the Cursed Art, or travail fútil as Molière called it in a moment of remarkable* foresight.
Step 1
Having changed into work clothes (old Army dress greens with Dominican Republic Campaign Ribbon will do), remove the wheel from the bike, using your shop manual as a guide to the particulars of axle removal, brake disconnection, speedometer cable kinking and the like. With tube-type tires loosen the lock nut on the valve stem while the tire is still inflated, to prevent twisting the stem. Release the air from the tire, this being done fastest by removing the valve core. Remove the stem lock nut and set the nut and valve stem aside in a safe place. If the tire is tubeless remove only the valve core and leave the stem in place. If the wheel has rim locks the nuts should be removed and the rim locks tapped up into the tire casing, away from the bead, as soon as the tire is deflated.
Pick a clean area to work on the tire. Any grit, metal shavings or other debris stuck to the tube or tire bead will raise havoc in the best saddle burr tradition. It is also a good idea to lay the wheel on a nonabrasive surface such as cardboard, plywood, or another old tire to protect the hub and rim, as well as sprockets and brake rotors. It is impossible, however to work on a heavy-duty tire like a six-ply 500-18 knobby if it is laid atop another tire because the sidewalls will be pushed together, making tube extraction and installation a real wrestling match. The best bet when changing tough ones, usually rears, is to cover the sprocket with a rag and lay the wheel sprocket side down on the floor. The sprocket will hold the rim away from the floor in good working position, and even aluminum alloy sprockets are tough enough to take the rigors of a tire change without warping or other damage. Except for breaking the bead on one side, do all rear tire work sprocket side down. Money saved on medical treatment for gashed knuckles can be spent on new tires or much-needed motorcycle magazines.
Some mechanics like to change tires with the wheel laid on a milk crate or the open end of a 30-gal. drum, which works well for alloy wheels but can be hard on wire spokes.
Step 2
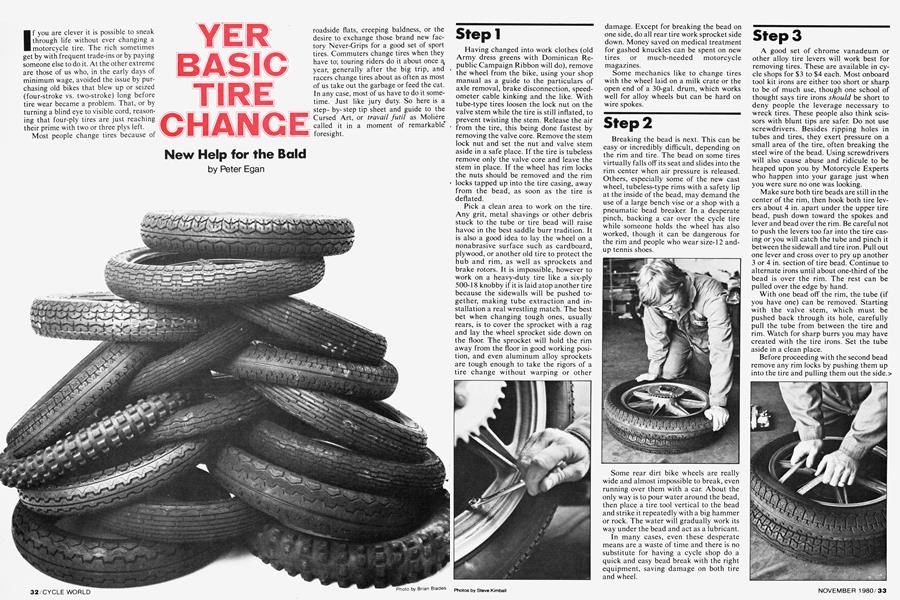
Breaking the bead is next. This can be easy or incredibly difficult, depending on the rim and tire. The bead on some tires virtually falls off its seat and slides into the rim center when air pressure is released. Others, especially some of the new cast wheel, tubeless-type rims with a safety lip at the inside of the bead, may demand the use of a large bench vise or a shop with a pneumatic bead breaker. In a desperate pinch, backing a car over the cycle tire while someone holds the wheel has also worked, though it can be dangerous for the rim and people who wear size-12 andup tennis shoes.
Some rear dirt bike wheels are really wide and almost impossible to break, even running over them with a car. About the only way is to pour water around the bead, then place a tire tool vertical to the bead and strike it repeatedly with a big hammer or rock. The water will gradually work its way under the bead and act as a lubricant.
In many cases, even these desperate means are a waste of time and there is no substitute for having a cycle shop do a quick and easy bead break with the right equipment, saving damage on both tire and wheel.
Step 3
A good set of chrome vanadeum or other alloy tire levers will work best for removing tires. These are available in cycle shops for $3 to $4 each. Most onboard tool kit irons are either too short or sharp to be of much use, though one school of thought says tire irons should be short to deny people the leverage necessary to wreck tires. These people also think scissors with blunt tips are safer. Do not use screwdrivers. Besides ripping holes in tubes and tires, they exert pressure on a small area of the tire, often breaking the steel wire of the bead. Using screwdrivers will also cause abuse and ridicule to be heaped upon you by Motorcycle Experts who happen into your garage just when you were sure no one was looking.
Make sure both tire beads are still in the center of the rim, then hook both tire levers about 4 in. apart under the upper tire bead, push down toward the spokes and lever and bead over the rim. Be careful not to push the levers too far into the tire casing or you will catch the tube and pinch it between the sidewall and tire iron. Pull out one lever and cross over to pry up another 3 or 4 in. section of tire bead. Continue to alternate irons until about one-third of the bead is over the rim. The rest can be pulled over the edge by hand.
With one bead off the rim, the tube (if you have one) can be removed. Starting with the valve stem, which must be pushed back through its hole, carefully pull the tube from between the tire and rim. Watch for sharp burrs you may have created with the tire irons. Set the tube aside in a clean place.
Before proceeding with the second bead remove any rim locks by pushing them up into the tire and pulling them out the side.>
Step 4
With tube and possible rim locks removed, force the other tire bead off the rim. Set the wheel on end, hook a tire iron under the remaining bead from behind (“behind” being from the east if you are straddling the wheel and the tire is heading west in its journey off the rim) and lever the bead over the rim. Do the same with a second iron. Repeat until enough bead is over the rim to pull the rest off by hand. On some cooperative combinations of tire and rim this step can be done entirely by hand, just by pushing the tire over the rim and pulling it free.
Examine the rim before mounting the new tire. Chromed steel rims on older bikes often rust just inside the rim flanges and around the spoke nipples under the protective rim band. This rust is not your friend. It can flake off and puncture tubes or prevent the tire from seating properly. Rusted rims should be cleaned with a wire brush and scraper, then sanded smooth with emery paper. The rim band should be replaced because the old one will have rust embedded in the cloth or rubber. Don’t bother to buy a new rim band. Two wraps of electrical or one of duct tape around the inside of the wheel, with holes cut for the valve stem and rim locks, will work better. Unlike a rubber rim band, tape will seal out moisture, keep spoke nipples from loosening and pushing into the tube, fit conveniently under any rim locks instead of over the top and also stay put while you install the tube and tire.
Spoked alloy or aluminum wheels are soft and will burr easily under pressure from careless tire irons, so these wheels should be examined for sharp metal and sanded smooth.
Check the tire for directional arrows before mounting. Because front tires receive their heaviest loads braking and rears take abuse from hard acceleration, some manufacturers design tires to take stress in only one direction. Many dirt bike tires are also marked for rotation because the tread patterns are designed for one-way acceleration.
Tire companies often tell us that the biggest single cause of tire failure is using old tubes in new tires. And the phone company spends millions trying to make us homesick. The advice is accurate within reason, however, and tubes that are cracked, patched, or pre-date light beer and the phrases “go for it” and “bottom line” should be replaced. If you are mounting sport tires on your brand new bike the factory tubes should be okay. Check the sizes. A tube one size smaller than the tire is generally safe because it will expand to meet the tire, but don’t use a larger tube in a small tire or it will wrinkle and kink.
Step 5
Installing a new tire on the rim will be easier (i.e. remotely possible) with tire lubricant. New tubes come packed with a coating of powder on the rubber. This powder helps the tube slide around and settle inside the tire as it’s inflated. It’s a good idea to encourage this movement by sprinkling some extra talcum powder on the tube and inside the tire casing.
The tire bead also needs lubricant to aid installation and seating. There are several types of commercial tire lubricant in spray cans and bottles, varying mostly in drying speed and tackiness. Some grow very sticky when dry and discourage tire slip on the rim, but demand fast installation because that stickiness makes it hard to move things around if the valve stem becomes cocked. Silicone spray sometimes helps a difficult last section over the rim, but should be avoided as a general tire lube because it remains slippery and may cause tire slip on the rim under braking or acceleration.
Probably the most common home tire lube is a lowly mix of water and liquid dish soap. Pink works very well, though white and turquoise are hard to beat. Domestic strife can be reduced by wiping the black chain lube fingerprints off the decorator bottle before returning it kitchen sinkside. Plain water also works fairly well as a tire lube, as long as you keep the bead damp with a wet rag or sponge, and dirt riders usually prefer to use only water because it dries quickly without leaving any sloppy mess and doesn’t glue the tire to the bead, making tire changing more difficult in the woods or desert.
Spread a film of lubricant around the bottom bead and lay the tire on the rim. Slide most of the lower bead over the rim by hand and then use the tire levers hooked over the rim to pry the rest. With the first bead inside the rim flanges any rim locks can be loosely installed, with the lock nuts spun on a few turns. The tube is next. Install the valve core and inflate the tube just enough to hold its shape. Slide the tube carefully between the rim and upper bead and into the tire carcass, beginning with the valve stem lined up with its rim hole. When the tube is in, push the valve stem through its hole and screw the lock nut or valve cap on loosely. Tires with stiff sidewalls can make it hard to insert the valve stem, but it can be done if you push the bottom bead down toward its seat and accept a painful crushing of the fingers as an immediate penance for cursing.
Make sure the tube is fully seated in the tire cavity, not twisted and not bulging anywhere over the rim, then move the tire gently until the valve stem is straight (radial to the axle). When it is, the other bead can be levered over. This is the time to locate a balance dot (usually yellow), if your tire has one, on the tire adjacent to the valve stem.
Step 6
Apply tire lube to the upper bead. Starting opposite the valve stem, push as much of the bead as possible over the rim by hand, then begin to lever the remainder over the rim, using the straight end of the tire irons. If you have rim locks make sure your installation of the second bead doesn’t begin or end at a rim lock or you’ll never get the bead over the rim.
Sliding this last bead over the rim causes more grief and punctured tubes than all the other steps together. The Dual Rules of Tube Survival are: (1) Work the bead over the rim in short sections, moving no more than 3 in. with each lever change. And (2) don’t push the tire levers much past an angle of 90° to the rim. If you do the end of the lever can, and will, dig into the tube and pinch it against the inside of the rim. Approaching the final inches of the second bead, push the valve stem part way into its hole so the tube isn’t pinched when the last of the tire bead drops over the rim. Position of the tube over rim locks should also be checked as the bead is installed-to make sure the tube is on top of the locks and not pinched by them.
Pull out the valve stem to check it for straightness. If it’s angled, shift the tire around until the tube is straight. Also make sure the tube is completely tucked into the tire cavity and not caught under the bead. If it’s okay, fill the tire to about 45 psi to force the bead onto the rim, then let the air out and reinflate the tire to normal pressure. This last step ensures the tube is not crooked or binding inside the tire.
If the tire is tubeless, all this tube pinching advice can be happily ignored. The main concern with a tubeless tire, and some of the stiffer-walled tube tires, is that the bead seats properly. Before inflating, apply a good film of tire lube or water to both sides of the bead and rim seat. Inflate the tire initially with the valve core removed so you have enough air delivery to force the bead to seal. Getting a tubeless tire to seal sometimes takes a bit of doing; pushing on the center of the tread from two sides, bouncing the tire lightly on the floor as you pump air into it, and a record of good clean living will help. On some new tires where the sidewalls are stiff and the beads are pressed together from storage, wrapping a rope around the center of the tread and then twisting the rope ends with a stick or screwdriver will often push the beads out into sealing position.
When either type tire has popped onto its seat, inspect the sidewalls to make sure the tire is concentric with the rim. Most tires have a raised circle on the sidewall to aid in checking. If the tire is not straight it should be deflated, debeaded, and reinflated. A little more tire lube on the bead often helps in self straightening.
When the tire is straight and fully inflated tighten down the lock nuts on the rim locks and, if you have a street bike, the valve stem. Dirt bikers generally throw valve nuts away or back them up against the valve caps because lower tire pressures allow the tube and tire to slip occasionally under hard acceleration or braking. This movement will rip the core right out of the tube if the lock nut is tight. Better to have the valve stem crooked than torn.
Step 7
Balance the tire. The imbalance of some high speed street tires, and even dirt tires ridden over fast terrain, will have you looking for a set of barbells or small tool chest carelessly left in the tire casing. Vibrations and wobbles result. A ballpark balance can be done by supporting the wheel on its axle and applying weight opposite the heavy side, which will gravitate downward. Clip-on rim weights, stick-on weights, or solder wrapped around spokes can be used. A more accurate balance job, however, can be done on a real balance roller and runout stand, equipment most cycle shops will have. It’s beyond the intent of this article to explain tire balancing techniques, but balancing is a recommended final touch to the tire change and well worth the minimal charge at a local cycle shop for the rider who lacks either the equipment or the inclination.
Step 8
Ride the motorcycle all over the place and wear the tire out. Repeat entire operation.
More From This Issue
-
 Departments
Up Front
November 1980 -
 Letters
Letters
November 1980 -
 Departments
Books
November 1980 -
 Departments
Cycle World Roundup
November 1980 -
 Evaluation
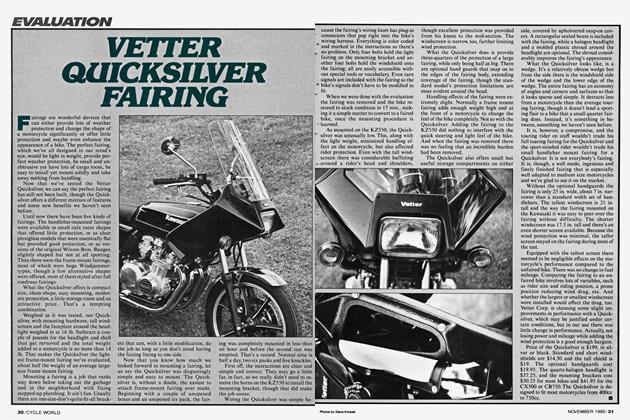
Vetter Quicksilver Fairing
November 1980 -
 Cycle World Test
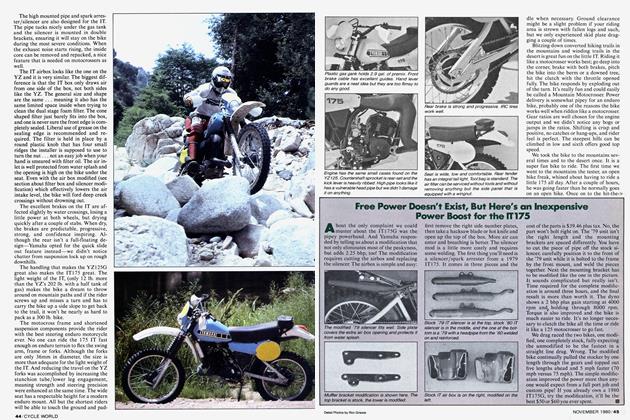
Free Power Doesn't Exist, But Here's An Inexpensive Power Boost For the It175
November 1980