29 Tips the Experts Never Told You
29 TIPS THE EXPERTS NEVER TOLD YOU
How To Get 10 Years' Worth of Experience in 10 Minutes
Ron Griewe
We are all experts and we are all beginners. Every motorcycle enthusiast begins with a blank slate. We go from there into what we learn the hard way, what we read in the magazines and what our friends tell us. It follows that we all know some things other people don’t know and they know things we don't know. From there we can assume that if every cycle fan had some way to share information and hard-won knowledge with other fans, we'd all learn from it.
The tips that follow came out of a session in the shop. While assembling a couple test bikes, one of the guys remarked that he's always wrapped spokes so the w ire ends point in. for safety. Someone else said he’d never thought of that. A third man chimed in w ith a memory of the thrill he got when he first saw a chain oiled the easy way. Great, we chorused. Let's put together a short list of the things experts know but are so easy that the experts forget other riders don't know them. There are surely scores more. In fact, anybody who wants to share some information along this line is invited to do so. We all have something to learn.
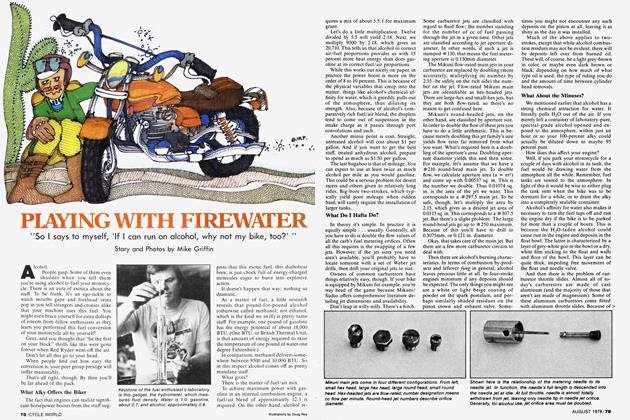
Running out of gas can happen as easily on the street as in the dirt. If you are riding with a buddy the solution is simple. Forget about trying to drain gasoline into a dirty beer can or such container. Find the longest piece of hose on the bike that comes close in diameter to the petcock diameter. (If you have a long gas cap overflow tube the job is easy.) Turn off the petcocks on both bikes. Attach the hose to both of them and switch the valves back on. Shoot the breeze a while and let the tank with gas fill the empty one! The liquids will seek a level and divide the fuel if both tanks are an equal height.
Probably the most difficult job when changing a tire is trying to get the rim band to stay in the proper place. The thing always seems to cover the valve hole or end up between the tire bead and rim. There is an easy fix . . . throw it away! Clean the rim and apply two or three layers of duct tape. Cut the holes for rim locks and valve stem with a sharp pocket knife or X-acto knife and a frustrating problem is eliminated.
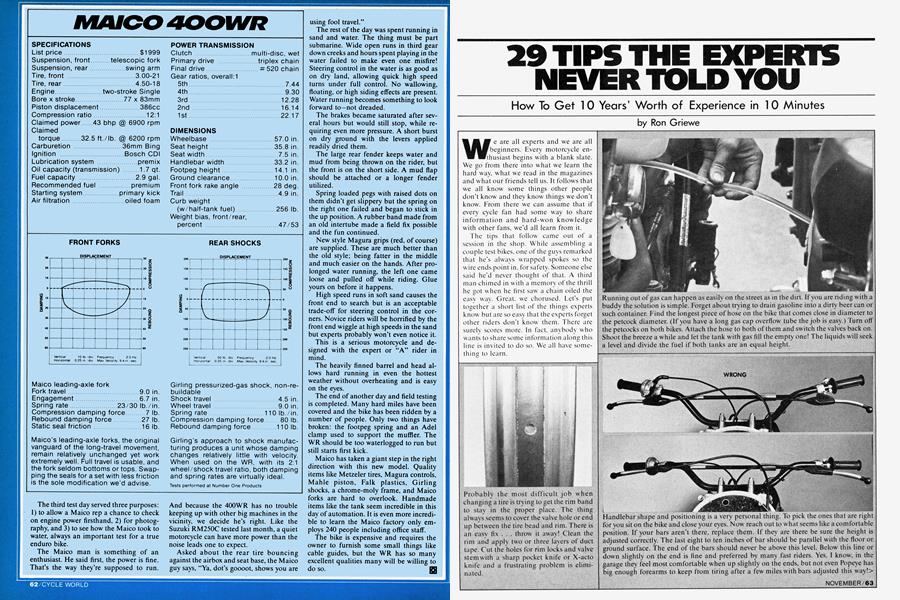
Handlebar shape and positioning is a very personal thing. To pick the ones that are right for you sit on the bike and close your eyes. Now reach out to what seems like a comfortable position. If your bars aren’t there, replace them. If they are there be sure the height is adjusted correctly. The last eight to ten inches of bar should be parallel with the floor or ground surface. The end of the bars should never be above this level. Below this line or down slightly on the end is fine and preferred by many fast riders. Yes. I know, in the garage they feel most comfortable when up slightly on the ends, but not even Popeye has big enough forearms to keep from tiring after a few miles with bars adjusted this way!>
To keep the master link clip on the chain cut a piece of metal from a coffee can or other thin piece of ferrious metal. Don't use aluminum. Cut the piece ¼-in, by I-in. Insert it between the clip and outside plate with the colored side away from you. Bend the metal over the clip and it i~ there to stay. Finding it again is easy since the colored part now shows.
Lost master links have probably caused more people to he stranded and have ruined more enjoyable outings than any other single cause. A little forethought and 50e can be the cure. Be sure to buy the correct size and brand for your chain. To be sure it isn't at home or in a lost tool bag when needed. clip it to the rear spoke crossings or to a cable housing.
Next time you ruin an innertube. save it, By cutting across it, strong rubber bands can be made. These are handy for holding things like spark plug wrenches, etc. Carry several. If a long one is needed tie several together.
Most bikes require the spark plug nut to be used but it usually comes loose in the package. Before installing it, use a thread sealant and tighten with a pair of pliers.
Spoke wiring is a standard thing to be done to off-road, cross country motorcycles. If done right, it adds strength to the spokes and in case of breakage it will prevent further damage caused by flopping. Elevate the wheel and work on the spokes that are away from you. Use 1618 gauge wire. Cut into 6-in, lengths and fold into U shapes. Slide one U at a time over the cross junction and wrap neatly and tightly at least three times ending with the open end toward you. Twist these together with a pair of pliers and trim excess being sure to leave three to four twists. Carefully bend down the end and a neat and strong tie is made. All sharp ends are facing the center of the wheel to make wheel maintenance safe.
Bing carburetors are notorious for losing the idle speed adjuster. A quick cure for this is to wrap a small wire around the carb and through the slot in the screw. Problem solved! While you are working on the carb remove the two screws that hold the top on and braze a washer into each slot. The top will now be easy to remove even when in the field.
Many new motorcycles are equipped with a gas cap that contains an overflow tube that exits into the steering stem. This a! lows fuel to discharge onto the front fender and blow back onto the motor. This can be fixed by using a 3' long piece of gas line and extending the outlet below the engine. Simple and easy.
If your scoot uses Allen screws to hold the side covers in place make sure you have the proper Allen wrench with you at all times. One can be taped to a frame tube, the bars, or about any place on the bike and is invaluable if needed 40 miles from your pick-up.
After removing the front wheel for mainte~ nance, don't tighten the axle pinch bolts until the bike has been set back on the floor and the forks stroked several times. This will align them and prevent binding.
Use gasket glue or weather strip cement to glue your grips on. Do it now before you forget! The newer style surgical rubber grips are deadly after being subjected to water. A horrible crash can become reality if water gets under grips that aren't glued on~
Three or four feet of heavy gauge wire wrapped around a frame tube can be handy if a pipe mount or other bracket breaks.
While you have the duct tape out put several winds of it around the handlebar. It can be used for all kinds of trail fixes.
To extend seal life on forks that don't use fork boots, cut a strip of poly foam long enough to completely encircle the fork tube. Oil or grease it and insert under the rubber seal protector cap. It will catch dust and greatly increase seal life.
If your bike is used in water a lot, drive a small cork into each end of the bar. This will keep water and muck out.
When lubing cables don't forget to lube the lever pivot screws and cable ball ends. This will increase their life and make them work much easier.
Tired of breaking control levers? Loosen the pinch screws until the lever can be turned on the bar by bumping with your hand. Next time you fall, the lever will he able to move and breakage problems will be almost eliminated.
When adjusting clutch and front brake cables be sure to leave the slot in the adjuster down. This helps prevent dirt and water from getting into the cable. After adjustment use a coin to lock the jam nut.>
The lock nut on the valve stem is supposed to keep the stem from being pulled into the tire, should the tire slip on the rim. Prob~ lem is, the tube will become stuck to the inside of the tire and will cause the stem to be torn from the tube if the tire moves very far. If it is left off, the stem will surely he pulled into the tire. The solution to this dilemma is actually quite simple: Be sure you have a good steel valve cap and seat it snugly. Then back the nut up against the cap. This wilt allow the stem to cock and will prevent it from being sucked into the tire. A casual glance will tell you if all is OK.
Proper throttle cable routing is many times overlooked. but is very necessary. Throttle cables on most new models designed for MX are routed forward and back through the number plate. Fine for the purpose intended. Street bike cables are routed down and back. Again fine for the Street. Both can be disastrous if used in trees or brushy areas. Something is sure to reach out and give you full throttle when you least expect it. For these areas, route the throttle up and back toward the rider. If it is snagged in this position take up another sport!
So you just bought a new off-road bike. Do yourself a favor and tighten the spokes before you ride it. If this is done chances of spoke failure will be minimized. This is especially important on Japanese bikes.
Next time you go on a long endurance type event try running an extra throttle cable next to the present one. Tape the ends to keep dirt out. If you need it. hookup will be quick and simple.
If you notice a cocked valve stem on your bike don't panic. The correction is simple. The wheel doesn't even have to be removed from the bike. Let the air out by removing the valve core. Next loosen the rim locks if so equipped. Now elevate the wheel and have a companion hold the brake on for that wheel. Grab the tire and move it the direction needed to bring the stem back to normal. Reinflate and the problem is cured.
Solo chain oiling takes only a minute if you grab the left bar and rock the bike toward you on the side stand. With the engine idling, drop the transmission into first while gripping the clutch lever. Clutch drag will spin the wheel slowly and you can spray the chain as it moves toward the countershaft sprocket. (If neutral is difficult to find, don’t start the engine. Leave the gearbox in neutral and spin the back wheel with your foot. It’s a balancing act but it works.)
continued on page 91
continued from page 66
Ifyour bike is to be used in brushy areas tie the front brake cable into the adjuster at the backing plate. This will prevent brush from pulling the housing from the adjuster.
Unless your new dirt bike has been bought from a dirt-oriented shop, the magneto nut is probably loose. Check it to make sure. Use Loctite and tighten with a torque wrench to the proper specs. While the cover is off use silicone seal on the mating surfaces to keep water out.
Be sure to check your tire pressure regu larly and check for sticks, nails, etc. Bikes used off-road should be checked after each ride. The sticks from the last ride that are stuck in the tire may give you a flat next time out if not removed. Use an ice pick or other sharp tool to pry them out.