Honda Xl175 Revisited
HONDA XL175 REVISITED
Many Months And Tough Miles Have Hardly Phased Our Little Boomer
MOST REGULAR READERS OF CYCLE WORLD will remember the Japanese 175 comparison test that took place in our April issue. The controversial, but undisputed winner, a Honda XL175 four-stroke Single, impressed us to such a degree that we decided to keep the machine and add it to the growing list of staff-owned motorcycles.
Our main idea was to make the 175 more enduro-ready. It would be a machine that we could keep around to teach people how to ride, loan to friends for weekend jaunts, and just generally have fun on with little in the way of maintenance hassles. The Honda 175 has fulfilled all our expectations completely and has turned out to be one hell of a fun little motorcycle.
Since the majority of our riding was to be done in the dirt, and several rough enduros were planned for the bike, we set it up in a manner requisite to those conditions. We did not try to go out of our way to "trick" the 175 up and add considerably to the cost; just the basics and down to earth simple modifications would be employed. And the main idea of the plan was to wind up with a street-legal (and endurolegal) motorcycle.
We began phoning up various accessory manufacturers and were immediately surprised to find that several already had products on the market for Honda's mid-sized thumper. Consequently, the bike can be improved a great deal without machine work and with very little welding. Here's what we did.
First, we thoroughly cleaned our comparison test winner and put it in the center of our shop. You need a lot of room for the XL because a bunch of parts and weight can be removed if street riding is not the prime objective. We unbolted the turn signals,removed the wiring for them, and unbolted the tachometer. The tach can be handy at times, but out riding in the rough stuff there really isn't time to be glancing at the rpm. And since the XL is a fairly meaty bike, every little bit of weight you can save helps. With the tach removed, the bracket holding the unit can be ground or filed away.
Since the stock fuel tank is limited in capacity, we needed one that would hold at least three gallons. We looked into the possibility of using one of the Vesco Skinny Fats, but one was not yet available for the smaller 175. Then we found one made by PMC for Huskys; it's unbreakable plastic and holds 3.3 gal. of fuel, is narrow enough not to interfere with the rider, but isn't the prettiest thing around.
Mounting is fairly easy. First, cut the forward gas tank mounts off the frame with a hacksaw and file the area flat. Hose clamps are used to attach the central PMC mount to the top tube, and tank pads (also available from PMC), can be fastened with duct tape. PMC tank pads settle, so be sure to have ample clearance between the bottom of the tank and the top engine mount.
Before we bolted the tank down solid, we moved the ignition switch. On the stock XL it's located under the tank and the key is vulnerable to breakage. We cut the wiring harness about six inches from the key and remounted the switch in rubber where the tachometer used to be. To reconnect the switch, 12 inches or so of extra wire must be spliced into the harness. We used the same colors as stock to avoid confusion, and silver-soldered all connections.
Handlebars came under our scrutiny next. The stock ones bend, so we scouted around for something stronger and ended up with J-Bars by Malcolm Smith. J-Bars are made from solid aluminum and do not have a cross bar. Flex is the reasoning behind this and that trait is desirable because less shock is transmitted to the hands and wrists when the suspension bottoms. When mounting J-Bars, be sure to bevel the edges of the handlebar mounts. If this is not done, breakage may occur.
The stock throttle was remounted, but the grips and levers were discarded. The grips tear too easily and were thus replaced with softer ones that don't. Breakage is not normally a problem with Honda levers, but it is possible, so we substituted UNI-lever plastic units in their place.
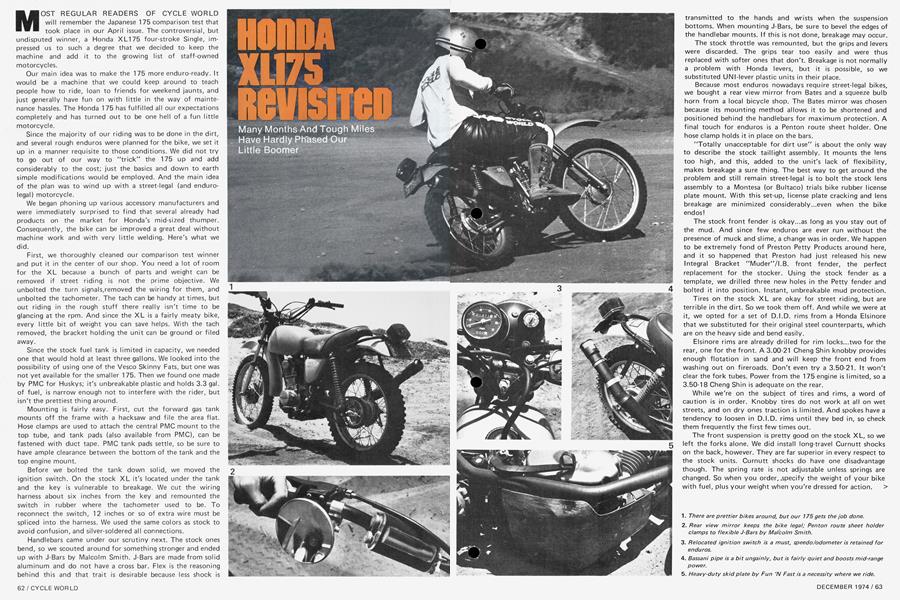
Because most enduros nowadays require street-legal bikes, we bought a rear view mirror from Bates and a squeeze bulb horn from a local bicycle shop. The Bates mirror was chosen because its mounting method allows it to be shortened and positioned behind the handlebars for maximum protection. A final touch for enduros is a Penton route sheet holder. One hose clamp holds it in place on the bars.
"Totally unacceptable for dirt use" is about the only way to describe the stock tail I ight assembly. It mounts the lens too high, and this, added to the unit's lack of flexibility, makes breakage a sure thing. The best way to get around the problem and still remain street-legal is to bolt the stock lens assembly to a Montesa (or Bultaco) trials bike rubber license plate mount. With this set-up, license plate cracking and lens breakage are minimized considerably...even when the bike endos!
The stock front fender is okay...as long as you stay out of the mud. And since few enduros are ever run without the presence of muck and slime, a change was in order. We happen to be extremely fond of Preston Petty Products around here, and it so happened that Preston had just released his new Integral Bracket "Muder'VI.B. front fender, the perfect replacement for the stocker. Using the stock fender as a template, we drilled three new holes in the Petty fender and bolted it into position. Instant, unbreakable mud protection.
Tires on the stock XL are okay for street riding, but are terrible in the dirt. So we took them off. And while we were at it, we opted for a set of D.I.D. rims from a Honda Elsinore that we substituted for their original steel counterparts, which are on the heavy side and bend easily.
Elsinore rims are already drilled for rim locks...two for the rear, one for the front. A 3.00-21 Cheng Shin knobby provides enough flotation in sand and will keep the front end from washing out on fireroads. Don't even try a 3.50-21. It won't clear the fork tubes. Power from the 175 engine is limited, so a 3.50-18 Cheng Shin is adequate on the rear.
While we're on the subject of tires and rims, a word of caution is in order. Knobby tires do not work at all on wet streets, and on dry ones traction is limited. And spokes have a tendency to loosen in D.I.D. rims until they bed in, so check them frequently the first few times out.
The front suspension is pretty good on the stock XL, so we left the forks alone. We did install long-travel Curnutt shocks on the back, however. They are far superior in every respect to the stock units. Curnutt shocks do have one disadvantage though. The spring rate is not adjustable unless springs are changed. So when you order, .specify the weight of your bike with fuel, plus your weight when you're dressed for action. >
Power output at maximum rpm is adequate on the stock bike, but punch in the mid-range is lacking. A simple solution is to change the exhaust pipe. We are currently running a Bassani system with spark arrester. This set-up picks up mid-range power considerably, which makes hillclimbing and tight woods sections much easier. Top end is about the same.
The Bassani system is mounted low, like the stock one, but does not clear the rear brake lever. Cutting the lever near the pivot, overlapping the two halves for greater outboard clearance, and then rewelding will provide the necessary clearance. Care must be taken here, as too much clearance between the pipe and the brake pedal will create a clearance problem with the kickstarter assembly.
The stock pipe is not nearly as heavy as the units fitted to the XL250s and 350s, and, surprisingly, the Bassani pipe, complete with spark arrester and silencer, is not any lighter. We had to reinforce the pipe under its center mounting bracket, where it broke after about 500 miles of off-road riding. The internal baffling has come adrift twice, as well, and we've had to do a little welding there.
As a final touch we added a Fun 'N Fast skid plate that is wide enough to protect both the magnesium engine cases and that low-mounted pipe. We just bolted it into place.
When the modifications began, 400 miles showed on the odometer. Now there're more than 1500. One thousand of those miles were chalked up in enduros. The remaining 500 or so were put on cow-trailing in rugged Baja California.
As for problems, well, they've been minimal. We burned up one clutch, so we called Bill Bell at Long Beach Honda and asked him for a cure. The cure, believe it or not, is to sh^fcthe stock clutch springs with spark plug washers. Char^aion washers will fit. Other brands have to be filed slightly. Time required is about 20 minutes, unless you have to replace the fiber plates and springs like we did. That required an additional five minutes.
Going strictly by instructions in the owner's manual, we've performed routine service on three separate occasions. Valves needed attention only twice. The XL175's easy for anyone to work on and laughs at abuse. Gas mileage, even in rugged enduros, is next to phenomenal.
As for accomplishments, if 1000-plus miles of virtually troublefree off-roading is not enough, the bike showed enough guts to bring home a trophy in the 500-mile Greenhorn Enduro, and that isn't bad for a bike that is equally at home puttin' to the corner market! So far, the machine's detractors are the only ones we've heard say, "Oink!'' We said that the bike was a winner back in April, and we say it again, many, many hard miles later.
HONDA XL175
More From This Issue
-
 Departments
Up Front
December 1974 -
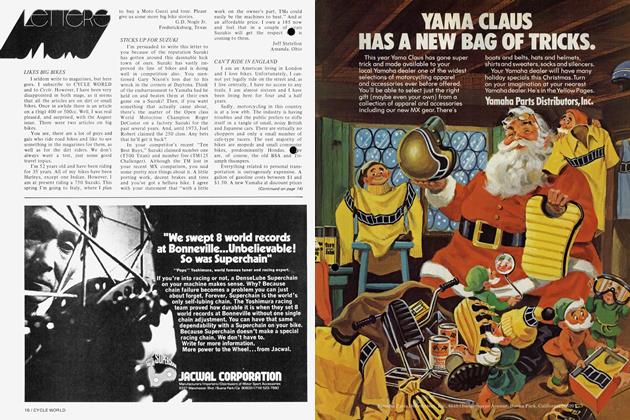 Letters
Letters
December 1974 -
 Departments
Feed Back
December 1974 -
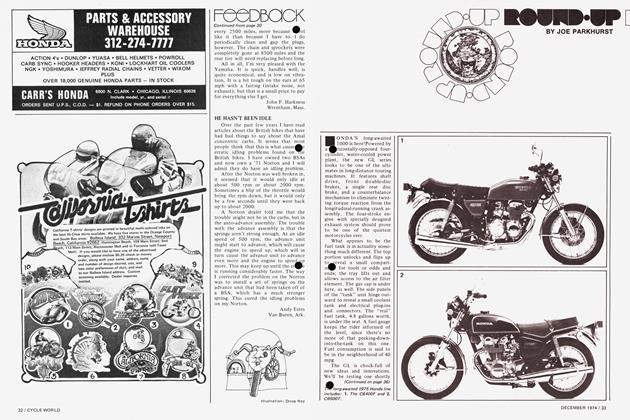 Departments
Round·up
December 1974 -
 Features
Going Down On the Hook
December 1974 -
 Features
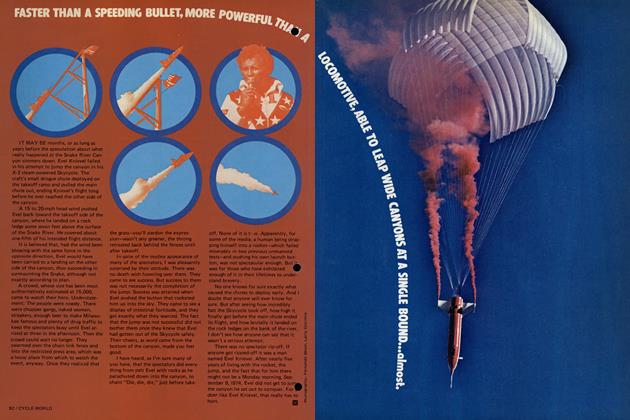
Faster Than A Speeding Bullet, More Powerful Than A Locomotive, Able To Leap Wide Canyons At A Single Bound...Almost.
December 1974