Service
SERVICE
DEPARTMENTS
Paul Dean
Forkin’ around
Lately, my relationship with my bike has grown a bit stale (sort of like my sex life) due to, I think, a lack of variety. So, in the spirit of change, I've been contemplating the idea of modifying several parts of my 1994 Honda VFR750. I’d like to know what factors I should keep in mind when swapping a stock front fork with an inverted type sourced from, say, a 2003 Suzuki GSX-R1000. If you have some definitive advice (either about “forking” or...well, you know), I’m all ears. James Eng
Trenton, New Jersey
If you truly are “all ears,” that certainly would explain the problems with your sex life. As far as a fork swap is concerned, there are several factors to consider when selecting a replacement. But even when you have all the relevant measurements, you still may be faced with a bit of a guessing game.
Steering geometry tends to be an incredibly sensitive aspect of any motorcycle ’s handling behavior. A change of a mere degree or two in steering-head angle or a few millimeters of frontwheel trail can completely alter a bike ’s character, sometimes transforming it from confidence-inspiring to downright scary, or vice versa. Many motorcycle designers admit that despite all the resources available to them, including sophisticated steering-geometry computer programs and reams of engineering data, they often don’t know how a new model under development will steer until someone actually rides it.
I don’t know of anyone who has ever swapped a ’94 VFR750 fork for a latemodel GSX-R1000 ’s, so I can’t tell you how that exchange would work. I can tell you, though, that two of the most important factors are the effective length of the fork, measured from the top of the lower triple-clamp to the axle, and the fork offset, which is the distance from the centerline of the steering stem-the “steering axis ’’-out to the axle, measured perpendicular to the axis. If the fork is not the same length as the original, the effective steering-head angle will be changed. If the offset is different, the front-wheel trail will be altered. Whether or not such changes will have positive or adverse effects on steering behavior is impossible to predict. You won’t know until you try it.
There are other considerations, as well, such as the length and diameter of the steering stem; the likely need to fit different handlebars; fitting the front wheel, front fender and front-brake system to the fork legs; maintaining handlebar clearance with the fairing cutouts at full steering lock, etc. I’ve seen many different fork swaps-some successful, some not—but making them work usually required quite a lot of machining, fabrication and ingenuity—not to mention a reasonable amount of money.
Rotor floater
I’ve been reading your magazine for a long time, and I’ve always wondered why some brake rotors are called “floating.” Could you explain what makes a brake rotor floating and how it differs from one that is not? Todd Huestis
Raleigh, North Carolina
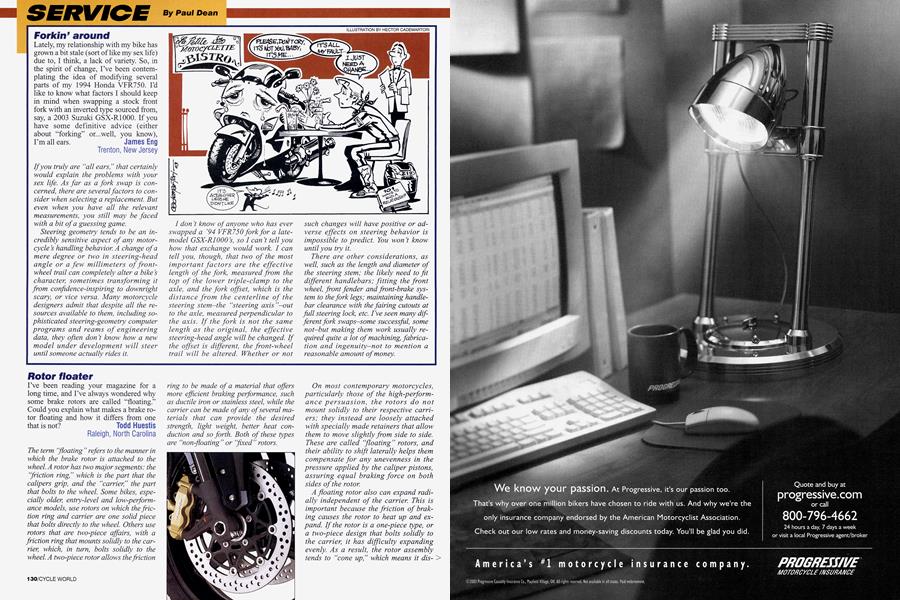
The term “floating ” refers to the manner in which the brake rotor is attached to the wheel. A rotor has two major segments: the “friction ring,” which is the part that the calipers grip, and the “carrier,” the part that bolts to the wheel. Some bikes, especially older, entry-level and low-performance models, use rotors on which the friction ring and carrier are one solid piece that bolts directly to the wheel. Others use rotors that are two-piece affairs, with a friction ring that mounts solidly to the carrier, which, in turn, bolts solidly to the wheel. A two-piece rotor allows the friction ring to be made of a material that offers more efficient braking performance, such as ductile iron or stainless steel, while the carrier can be made of any of several materials that can provide the desired strength, light weight, better heat conduction and so forth. Both of these types are “non-floating” or “fixed” rotors.
On most contemporary motorcycles, particularly those of the high-performance persuasion, the rotors do not mount solidly to their respective carriers; they instead are loosely attached with specially made retainers that allow them to move slightly from side to side. These are called “floating” rotors, and their ability to shift laterally helps them compensate for any unevenness in the pressure applied by the caliper pistons, assuring equal braking force on both sides of the rotor.
A floating rotor also can expand radially independent of the carrier. This is important because the friction of braking causes the rotor to heat up and expand. If the rotor is a one-piece type, or a two-piece design that bolts solidly to the carrier, it has difficulty expanding evenly. As a result, the rotor assembly tends to “cone up,” which means it distorts into a slight dish shape that prevents the caliper from applying equal pressure across its face. But with a floating rotor, the expansion rate of the friction ring is not affected by the carrier, so the ring can expand freely without any interference. And because the friction ring of a floating rotor cannot transfer as much heat into the carrier that bolts to the wheel hub, it also allows the wheel bearings to run cooler, which helps the bearings enjoy a longer service life.
These heat concerns are not much of a problem on motorcycles that only are subjected to mild braking forces, such as cruisers and entry-level machines. It’s a major concern, though, on racebikes, sportbikes and other high-performance models,which have to cope with huge amounts of heat caused by heavy and repeated high-speed braking.
The Bandit, she is bent
I have a 1996 Suzuki Bandit 600 that I bought from a friend who dropped it several times during his ownership. The fork seals started to leak, so I removed the fork legs to change them. When I tried to reinstall the legs, the right one slipped right in but the left one would not. It refused to line up with the upper tripleclamp, so I had to kind of shoehorn it in there. Does this mean I have to replace the triple-clamps entirely or can they be adjusted? D.F. Kiernan
Posted on www.cycleworld.com
There are no such things as tripleclamps that are “adjustable ” to compensate for misalignment. Something is bent, and it s either the left side of your Bandit’s lower triple-clamp or the left fork tube. It’s easy to determine which is the offending item. First, slide the left fork leg down out of the upper tripleclamp just far enough to barely clear the bottom edge of the clamp, then rotate the > tube 360 degrees in the bottom tripleclamp. If the leg is bent, you will easily detect the run-out at the top of the leg, adjacent to the bottom of the upper triple-clamp. You might also perform the same test with the right fork leg to ensure that it is not bent. If neither leg shows any run-out, one of the triple-clamps is bent. Rarely does a top triple-clamp get tweaked in anything other than a serious, full-on crash, so almost assuredly, the problem would be with the bottom one. If it’s only bent slightly, you might be able to straighten it by installing one of the fork legs in it and using the leg as a long pry bar to bend the clamp back into alignment. This technique can work if the clamp is only marginally bent, but don’t try it if the bend is severe. Replace the triple-clamp instead.
Cool under pressure
I own a 1998 Kawasaki ZX-6 and am in need of assistance concerning its cooling system. I would like to change the coolant and do the job myself, but I don’t want to dive into it without first asking some questions, such as, is my bike’s cooling system pressurized? Also, I noticed that on the right side of the bike, near the radiator cap, there’s what looks like a bleeder valve, and there’s another one on the water pump down on the left side. Are these involved in the coolant-change procedure? It would be easy to just loosen a hose and let gravity do the job, but there has to be a right and a wrong way to do it. Kip Carr
Posted on www.cycleworld.com
Yes, your ZX-6's cooling system is pressurized, as are those on all liquid-cooled > motorcycle and automobile engines. And yes, those two little valves are bleeders that allow trapped air to be purged from the system.
Recall Roster
NHTSA Recall No. 03V005 Harley-Davidson Dyna Wide Glide Model year: 2002 Number of units involved: 1762 Dates of Manufacture: March ’01 to June ’01
Problem: The rear brake-line assembly could develop an internal fracture, possibly allowing the line to leak. This would cause loss of rear-brake operation, possibly without warning, increasing the risk of a crash.
Remedy: Dealers will replace the brake line. Owners who do not receive this free remedy within a reasonable time should contact HarleyDavidson at 414/342-4680.
Changing the coolant is not a complicated task, but it does involve use of those bleeders. After the old coolant has been drained, slowly pour new coolant into the system until it is right up to the top of the filler neck, next to the thermostat housing. Then open both of the bleeder valves, which will allow most of the air in the system to escape. Once air bubbles stop emerging from the bleeders, close both of them and top off the system. Start the engine and let it run at idle with the radiator cap removed until bubbles stop emerging from the coolant. Top off the coolant once again, install the radiator cap, then fill the reservoir tank up to the “full” level. The coolant swap is complete. You also might want to either replace the radiator cap or have it tested by a shop to determine if it holds its intended pressure of 18 psi.
Foul play
I own a 1991 Yamaha FZR600 that I’ve had for about 6 years and is now showing about 15,000 miles. It ran fine until two years ago, when it started fouling the Number 3 sparkplug. I’ve taken it to many shops, all of which have messed with the jetting, and cleaned and synched the carbs, but to no avail. One shop even told me that the problem was my riding style, which involves a lot of cruising at about 4500 rpm. The odd thing here is that the plug does not foul at consistent intervals; it could take as little as 50 miles or as much as 200 miles. I’m thinking that the cause is either bad rings or valves, but I’m starting to believe that it is the valves because there is no smoke coming from the exhaust. I’ve scheduled a leakdown test to hopefully end the confusion. What do you think? Eric Scott
Posted on www.cycleworld.com
TOOLTIME
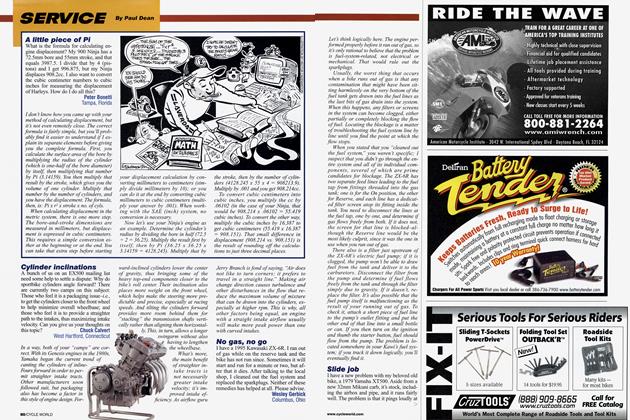
Ever stripped the threads in your bike's oil pan or oil tank when changing the oil? It's a pretty easy mistake to make, especially if you change oil frequently and your bike has a steel drain bolt in an aluminum hole. If this happens to you, and the threads in the hole are not completely destroyed, there may be a cheap, easy fix. The standard method of repairing damaged threads is with a tap, but finding one with the correct diameter and thread pitch to match your drain bolt can be difficult and time-consuming, especially for larger metric sizes.
Instead, you can simply make a tap out of the drain bolt itself. Using a die grinder or r a small thin cutting / wheel cut three grooves across the -bolt's threads as shown in the photo, spac ing them equidistantly around the circum ference of the bolt. The goal is to emulate the flutes in an actual thread tap. Cut the grooves slightly deeper (about 1/16") and wider (about 1/8") at the beginning of the bolt, gradually tapering them down to nothing so the last couple of threads re main untouched. Also, leave the edges of the grooves reasonably sharp so they will cut effectively enough to trim the dam aged threads.
Once the grooves are cut, carefully start the bolt into the hole, making sure it's straight; when you can turn it inward about a half-turn with your fingers, you're ready to use a wrench. Turn the bolt in only a quarter-turn, then back it off about an eighth-turn. Then go in another quarter and back out another eighth. Keep repeat ing that quarter-turn-in/eighth-turn-out sequence until the threads are restored. If you remove the bolt a few times during the rethreading process and carefully clean it and the hole, you won't get any metal chips in the oil pan. Finally, put the gasket back on the bolt and thread it back in place, where it will continue to serve as a drain bolt-unless you once again need to use it as a tap. -Paul Dean
The Number 3 cylinder on your FZR is getting a weak spark, that what I think. The two substances that foul plugs are excess oil or excess fuel, but the absence of exhaust smoke indicates that neither is the culprit. That points to a weak spark as the likely cause. If the spark is mar-~ ginal, it will continue to ignite the mixture until just enough normal deposits accumulate on the plug’s electrodes to raise the electrical resistance to the point where the spark can no longer arc across the gap. The plug is then fouled.
Your FZR has two ignition coils, one that fires cylinders 1 and 4, another that fires cylinders 2 and 3. The same coil that fires cylinder Number 3 also fires Number 2, which does not foul. This indicates that there may be a problem with the wiring for the Number 3 cylinder. It could be a broken or loose plug wire, or a faulty contact in that cylinder ’s sparkplug cap. As a basic test, try switching the plug wires on cylinders 2 and 3, then see if the plug-fouling problem moves to cylinder Number 2. If it does, you ’ll know that the problem is somewhere in that particular plug wire.
If the fouling problem remains with Number 3, the cause is most likely a combination of a weak spark produced by the 2/3 coil and a slight fuel richness or a small amount of oil entering the Number 3 cylinder. Under normal circumstances, the presence of that excess fuel or oil would not be problematic; but with a weak coil, the spark is not strong enough to overcome the added resistance caused by the deposits that quickly form on the electrodes.
I suggest you either replace the coil or take it to a Yamaha shop that has a factory service tester that can evaluate the strength of the spark. If this is not possible, take both of your FZR ’s coils to an automotive electrical shop that can test them, and have them compare the output of the two coils to one another. If the output of the 2/3 coil is noticeably lower than that of the 1/4, you will have found the source of the plugfouling problem. □
Got a mechanical or technical problem with your beloved ride? Can’t seem to find reasonable solutions in your area? Maybe we can help. If you think we can, either: 1) Mail your inquiry, along with your full name, address and phone number, to Cycle World Service, 1499 Monrovia Ave., Newport Beach, CA 92663; 2) fax it to Paul Dean at 949/631-0651; 3) e-mail it to CW1Dean@aol.com; or 4) log onto www.cycleworld.com and click on the Feedback button. Please, always include your name, city and state of residence. Don’t write a 10page essay, but do include enough information about the problem to permit a rational diagnosis. And please understand that due to the enormous volume of inquiries we receive, we can’t guarantee a reply to every question.