Applied Torque
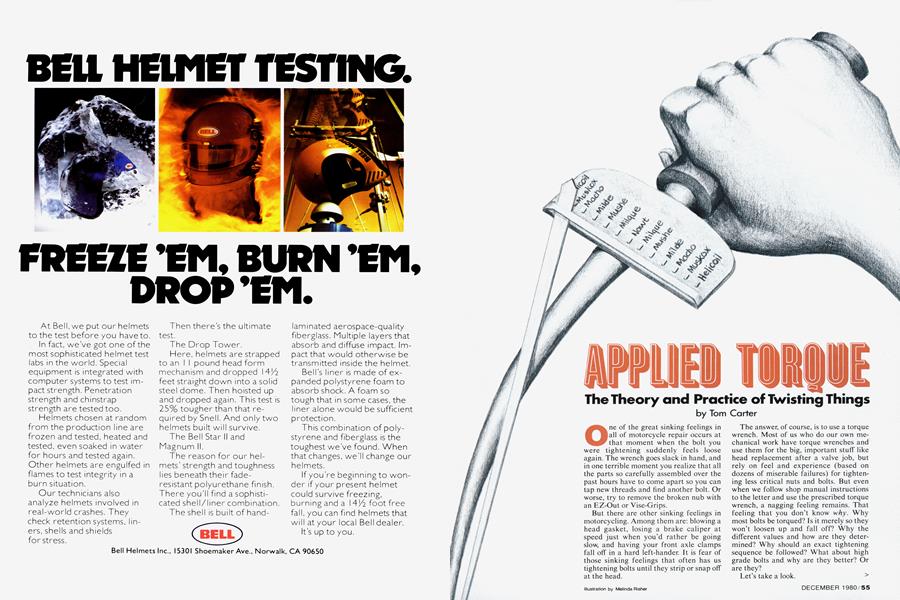
APPLIED TORQUE
The Theory and Practice of Twisting Things
Tom Carter
One of the great sinking feelings in all of motorcycle repair occurs at that moment when the bolt you were tightening suddenly feels loose again. The wrench goes slack in hand, and in one terrible moment you realize that all the parts so carefully assembled over the past hours have to come apart so you can tap new threads and find another bolt. Or worse, try to remove the broken nub with an EZ-Out or Vise-Grips.
But there are other sinking feelings in motorcycling. Among them are: blowing a head gasket, losing a brake caliper at speed just when you’d rather be going slow, and having your front axle clamps fall off in a hard left-hander. It is fear of those sinking feelings that often has us tightening bolts until they strip or snap off at the head.
The answer, of course, is to use a torque wrench. Most of us who do our own mechanical work have torque wrenches and use them for the big, important stuff like head replacement after a valve job, but rely on feel and experience (based on dozens of miserable failures) for tightening less critical nuts and bolts. But even when we follow shop manual instructions to the letter and use the prescribed torque wrench, a nagging feeling remains. That feeling that you don’t know why. Why most bolts be torqued? Is it merely so they won’t loosen up and fall off? Why the different values and how are they determined? Why should an exact tightening sequence be followed? What about high grade bolts and why are they better? Or are they?
Let’s take a look. > First of all, just what is this wonderful thing called torque? We know that engines produce it in varying amounts, but how does it relate to nuts and bolts? Essentially, torque is the force that twists an object about on its axis. The components of that twisting power are distance and force (see fig. I). More distance, in the vernacular, means “get a longer wrench” and more force could be translated as “jump on it.” Force multiplied by distance equals torque.
TORQUE
In fig.2, a torque is applied to our bolt. If the distance is 12 in. and the force happens to be l lb., when the torque applied to the bolt would be one pound-foot (lb.-ft.) or 12 inch-pounds (lb.-in.). Of course we could apply the same torque by using a distance of l in. and a force of 12 lb., or by using a distance of l mi. and a force of 1/5280 lb. (about 0.003 oz.), though the mere weight of the wrench, not to mention traffic at intersections, makes tools of that length impractical.
Now with some notion of what torque is, let’s see what happens when we “torque” a bolt. The bolt in fig. 3 is shown holding two parts together. Note that as the bolt is tightened a stretching force, Fi, is applied to the shank; at the same instant a compressive force is applied to the joined parts. This force produced when a bolt is tightened is called preload. Preload in a bolted joint is important for many reasons. The preload compresses joined parts, resulting in friction that prevents the parts from sliding and producing shear loads on the bolt.
Shear loads (Fs in fig. 3) are caused by the sliding action of parts across each other that tend to “shear” or cut the bolt that joins them. One of the backwater laws of physics states that the friction between two surfaces increases proportionally to the amounts of force pressing the surfaces together. Obviously, without this frictional resistance the bolt would be subjected to direct shear loads in addition to the external tensile loading (Fe in fig. 3). Sort of like having someone shout “catch!” while you’re doing chin-ups, you being the bolt.
The compression of the joined parts also prevents any separation of the joint due to tensile load (Fe). The engineer, by designing for proper preload, tries to avoid any chance of joint separation because if the joint separates the bolt will be forced to bear the entire shear and tensile load. In aircraft applications this can encourage a wing to fall off, leading in some cases to serious pilot error.
There are two other benefits of preload; the improvement of fatigue resistance and the locking effect on threads. But before dragging those topics into the light, let’s take a look at bolted joints, particularly those subjected to only a static, non-fluctuating load.
DESIGN OF BOLTED JOINTS
The engineer has a lot to consider in designing a bolted joint; expected load, geometry of the joint, gaskets, the strength and characteristics (elasticity, compressibility, etc.) of the bolts and parts, economics. The joint’s expected load and geometry tell him what kind of loading the bolts will have to endure: tension, shear, or a combination of both. The material of parts joined will determine the stiffness of the joint. “Stiffness” refers to how much the parts will compress when the bolt is tightened, and the amount of that compression determines how much load the bolts will have to carry. The use of gaskets forces the designer into a compromise, because the joint must be held together with sufficient preload to avoid separation and yet not compress the gasket so much that it becomes damaged and cannot maintain a proper seal.
Let’s look at an example of preload and the resulting compression of the connected parts. The scale with the 100 lb. weight in fig. 4 is equivalent to our bolt with a 100 lb. preload. If two rubber blocks are forced in position as shown so that the scale continues to read 100 lb. and the 100 lb. weight is replaced by a smaller one, say 10 lb., we now have a representation of a bolted joint with a 100 lb. preload, the parts in compression, and a 10 lb. external load. Note that adding the 10 lb. weight does not increase the tension in the bolt; if the tension were greater the scale would read more than 100 lb. As the weight is increased over 100 lb. the tension in the bolt increases but the joint does not separate until enough weight has been added to overcome the compression of the parts.
In other words, the resiliency of the compressed parts acts like a second spring, expanding to prevent separation at the joint. When the external load is great enough to overcome that compression, the joint will separate and the bolt will carry the entire load. And as Chico Marx used to say, “Atsa no good.” The preload and resultant compression of the joined parts can prevent separation even though the external load is greater than the preload.
MEASURING PRELOAD
Okay, so preload on a bolt and a tight joint are a Good Thing. But like all good things, except motorcycling and one or two vices we can think of immediately, they can be overdone. So the preload has to be measured. There are scientific industrial methods, such as electronic sensors on the bolt shank, nuclear-powered tape measures and so on, but these are hard to find at Sears or Woolco. The most common means of measuring preload in bolts are the torque wrench and the turn-of-thenut method. The torque wrench is used more often because the turn-of-the-nut method involves turning the nut finger tight and then tightening it a prescribed number of turns or flats with a wrench. The shortcoming of this method is that different individuals, say Woody Allen and Arnold Schwartzenegger, have different interpretations of “finger tight.”
If the torque wrench is the most popular method, it is also somewhat indirect. The torque measured by the wrench is really only an indication of the force required to turn a bolt to a certain position rather than the actual preload. The torque we apply to a nut or bolt, like income before taxes, is used up in several ways. About 50 percent is used in overcoming the friction between the bearing face of the nut or bolt and the surface of the part; approximately 40 percent goes to overcome thread friction, and the rest produces the bolt tension. Those percentages can vary because friction on the threads and head surfaces is reduced if the bolts are clean, unburred and lubricated. Plating also reduces friction, to about the same level as lubrication.
So when a manufacturer computes a torque value for a head bolt, for instance, he has to figure in not only this friction coefficient, but also bolt diameter and the desired preload. The grade of bolt is also important. Higher grade bolts can be tightened to a higher torque setting. This means that when a higher grade bolt is substituted for a low grade bolt of the same size, a much greater preload is possible in the joint. This point becomes very important when we consider fluctuating loads and fatigue effects. And we will.
FATIGUE
Fatigue is a concept easily grasped by dirt riders with bad knees. If you bend something enough times under load, it gives out. An external load that fluctuates between maximum and minimum value causes “fatigue loading”, and is much more likely to cause bolt failure than a steady load equal to the highest value of the fluctuating load. A 300-lb. man, for instance, may sit quietly on a Louis XIV chair with some success, but he should never jump up and down on it.
Tightening up a joint to a given preload adds a certain amount of stress to that joint, but contributes only a small percentage of the load causing fatigue stress. If you were to plot the push and pull of a fatigue load in the form of a wavy line, with the highs and lows of the wave being the extremes of stress, preloading the joint would reduce the size of the waves, bringing the stress closer to a constant, even load.
The fatigue strength of a bolt is determined by subjecting test samples to a fluctuating load until they fail. For steel the fatigue strength is often given as a fraction of the ultimate tensile strength of the bolt. Many factors influence this fatigue value; surface finish (smooth, rough, plated, unplated, etc.), size (larger sizes tend to have less fatigue resistance), reliability (the history of the material), temperature (higher temperatures tend to decrease fatigue strength) and stress concentration factors. Stress concentrations are any abrupt changes in cross section; holes, grooves, notches and other kinds of surface defects. For example, the stress concentration factor for rolled threads is much smaller than for cut threads.
All those variables can be combined into an overall fatigue strength reduction factor used by the engineer to set torque limits for a given bolt. In other words, not all bolts are created equal, and more than just size or the quality of steel determine how hard you can crank on a bolt, and whether or not you should use a 3 ft. breaker bar on your tail light lens screw.
So general torque recommendations, listed by bolt size and grade, are a fair guide to how hard you can lean on the torque wrench, but not the last word. The specific application makes a difference, and engineers take extra time to figure the torque numbers that appear in your shop manual. A rocker shaft bolt for an Ariel Red Hunter may not get the same torque as that on the Stemley-Avro 250 Tulip, even though everyone knows they’re the same size.
Using a higher grade bolt of course will allow higher torque settings without danger of snapping off the bolt head, but that higher preload also strengthens the joint. Before preload the bolt is subjected to most of the variation in loading; after preloading the connected parts carry a portion of the load. Although the maximum load on the bolt is higher because of the increased preload, the minimum load is also higher, due to the force required to compress the joint, so the average load is increased. As a result, the alternating stress component is reduced, producing a stronger, safer joint. Merely increasing preload, however, is not a universal remedy for bad designs, and too much preload can cause other types of stress problems in the joint.
THREAD LOCKING
The thread locking effect is also improved considerably by the use of preload. This effect is best illustrated by visualizing an inclined plane as representing a screw thread and a block of wood placed on the plane as a nut. If the plane is shaken or vibrated the block will wiggle back and forth until it eventually works its way to the bottom, like the loosening of a nut. To keep a nut tight, the bolt tension should vary as little as possible. Preloading improves its chances of staying tight because the alternating component of bolt load is reduced.
ANALYTICAL VS. THE REAL WORLD
What all this boils down to is that no single reliable formula exists that will tell designers what size bolt at what preload will work best for given applications. Experimental loading of the joints while monitoring with accurate test equipment (the old see-if-she-flies technique) is the only certain method.
Even if an engineer arrives at the one perfect preload for a certain joint, chances of applying that preload in Real Life are only fair. Assembly errors can cause the preload to drift off course in either direction. Let’s look at some of the causes of assembly error:
1. Tool inaccuracies: plus or minus 10 percent if a torque wren.ch with a plus or minus 5 percent error rating is used (worse, with a bottom-of-the-line torque wrench recently backed over by a fullsized family station wagon).
2. Operator error (that’s, ahem, us): conservatively plus/minus 10 percent, often worse. Drugs and loud radios are factors here.
3. Control: plus/minus 30 percent variation between controlled torque (what you read) and actual preload.
4. Short term relaxation: the bolt head embeds itself into the part or washer. Within a few minutes after torquing you can expect a 2-5 percent relaxation. Over a period of weeks there can be a loss of another 5 percent.
So error over 60 percent is possible even though you think you are spot on. This makes it sound as though you’ll be tearing off cylinder heads and brake calipers with each turn of the wrench, but these errors tend (with luck) to cancel each other out. The torque reading you see on the face of your wrench is never going to be an exact component of proper preload, but torquing as accurately as possible is important, especially when several bolts are used to hold a single part.
Bolts holding machined surfaces together are usually tightened in a particular order or pattern. This is to equalize force at each point on the surface and prevent distortion of the parts. In many cases, paying attention to the bolt tightening sequence and torquing each bolt equally is more important than the actual preload because distortion is the real enemy of closely machined joints. Cylinder heads are a prime example. Slight inaccuracies in the amount of torque are not serious so long as an equal amount is applied to each bolt. As mentioned, torque calculations can be somewhat imprecise by nature and include a safety factor which is often arbitrary, so the way you use a torque wrench (consistency) is as important as the raw numbers you feed into it.
Another aid to the solid, well-made joint is the high strength bolt, particularly in the case of a cylinder head. The varying gas pressure within the cylinder would be analogous to the highs and lows of the fluctuating external load mentioned earlier. Higher preload flattens the peaks of those dangerous waves, and high grade bolts simply allow you to use a higher preload without damage to the bolt. High strength bolts can produce high and consistent preloads but must be tightened to a tension equal to or greater than 70 percent of the minimum bolt tensile strength. They are generally a waste of money, then, unless used to their full potential. High grade bolts do provide greater shear strength, of course, in other applications such as hinge pins, anchor belts, etc., but their greatest value comes with the ability to carry preload.
TORQUING IT RIGHT
Before laying wrench to bolt you should make sure you know the correct value for your bolt and that you are using the correct units of measurement. Torque values can be given in units of inch pounds (lb.in.), pounds feet (lb.-ft.), meter kilograms (mk) or newton meters (n.-m.). Everything but candlepower per fortnight (cp/ fn) is available in torque wrenches, so take a second look at the shop manual and the wrench before you tighten the handlebar clamps to 110 pounds feet. Use the chart below for conversions.
Most wrenches are calibrated in lb.-ft. or n.m., but many of the 3/s-in. drive torque wrenches best suited for motorcycle work are calibrated in lb.-in. There are, as you might expect, 12 inch pounds to a pound foot, so conversion is fairly simple when your shop manual uses one value and your torque wrench the other.
Next make sure that your threads are clean and smooth. Clean them with a tap or die if possible, or at least a wire brush. A good quality anti-seize lubricant should be applied to the threads and under the bolt head to insure consistent and accurate readings.
When applying the torque, hold the wrench by the grip only and exert a slow steady pull. If more pull is needed place one hand on top of the other rather than side by side. If you are using deep socket or concentric extension the wrench can be supported at the head with one hand. Do not use any kind of extension or crowfoottype attachment unless you correct the torque setting accordingly. The reason being you have more leverage with a longer wrench and the calibration is no longer accurate. Of course this method can be put to advantage if you have a wrench with a 0-100 lb.-ft. range and you need 150 lb.-ft. of force. With the proper length extension you can up the indicated range of the torque wrench. Most torque wrenches come with an instruction book that explains this procedure.
Never try to torque or retorque a fastener that is already tight—cylinder head bolts for instance—without loosening, cleaning and lubricating first. If no tightening pattern is available, use a criss-cross tightening sequence of 20 percent increments until the final torque value is reached. Remember, consistency is the key to proper torquing; similar handling of the wrench, bolt threads and lubricant on all bolts will give the best results.
Parting advice? Keep torque wrenches in a safe place; a non-violent part of the tool box is better than the bottom of the hammer drawer. The pointer on beamtype torque wrenches is easily bent. If, unloaded, it doesn’t point to zero, all your readings will be under or over. And remember that the old mechanic’s advice “Torque it until it strips, then back off half a turn’’ belongs in the same misdirected hall of fame with, “Go get me a lefthanded sky wrench and bring back a bucket of steam.” Don’t do it. 13