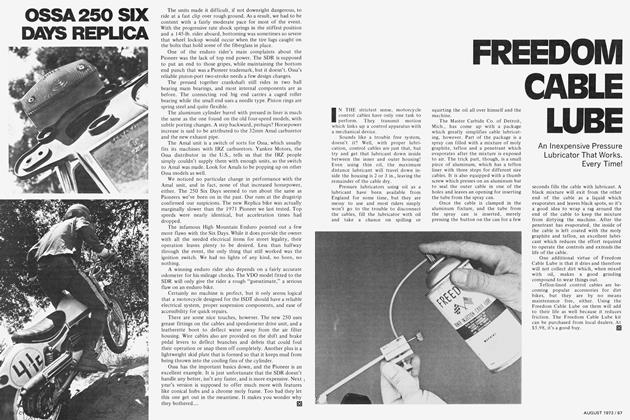
Enduring the Enduro On Yamaha's Dt360a
ENDURING THE ENDURO ON YAMAHA'S DT360A
Just The Basics
OKAY. SO you’ve gone ahead and bought Yamaha’s new 360 dualpurpose machine. You’ve run it hack and forth to work for a month or , maybe played around in the corner lot on occasion. It’s just what you wanted...the perfect instrument for fun and relaxation.
But the corner lot isn’t nearly as challenging as it once was, and you have a hankering to do some serious off-road riding, even though you’re not really sure what more serious riding entails. That guy down the block with the Bultaco keeps bugging you about going riding in an enduro...whatever that is... and what the heck, this thing’s an enduro model, right? Right. But to compete safely, more comfortably and easily in any enduro event on this particular machine, a few basic changes are in order.
CYCLE WORLD wanted to find out just exactly what it takes to make the new Yamaha “enduro ready.” After a thorough road testing evaluation, we were well aware of the 360’s shortcomings for more serious off-road riding, so we decided to remedy them and run the bike in several enduros.
WHAT TO DO
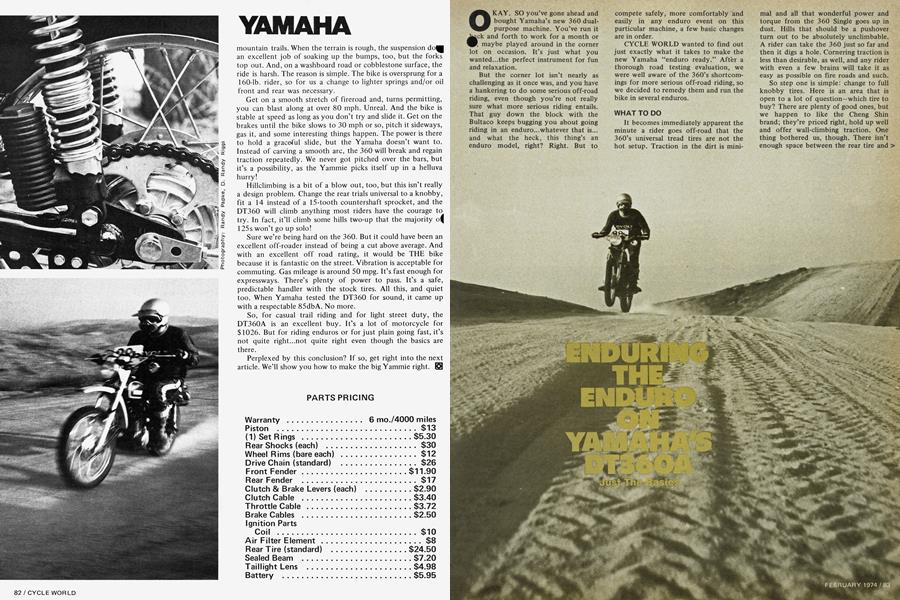
It becomes immediately apparent the minute a rider goes off-road that the 360’s universal tread tires are not the hot setup. Traction in the dirt is minimal and all that wonderful power and torque from the 360 Single goes up in dust. Hills that should be a pushover turn out to be absolutely unclimbable.
A rider can take the 360 just so far and then it digs a hole. Cornering traction is less than desirable, as well, and any rider with even a few brains will take it as easy as possible on fire roads and such.
So step one is simple: change to full knobby tires. Here is an area that is open to a lot of question—which tire to buy? There are plenty of good ones, but we happen to like the Cheng Shin brand; they’re priced right, hold up well and offer wall-climbing traction. One thing bothered us, though. There isn’t enough space between the rear tire and > exhaust pipe. Even the stock rear tire was rubbing the pipe slightly.
There are two solutions. One is to find the nearest ball peen hammer and dent the pipe slightly where the tire makes contact. This way a 4.00-18 Cheng Shin will fit right in. The other is to fit a 15 mm spacer under the rear exhaust mount bolt. The proper spacer should be available at Yamaha dealers shortly. (Later models will come stock with proper exhaust clearance.) While you have the rear wheel off it might be a good idea to blow out the brake drum and shoes with some compressed air. And if the lining surfaces are glazed, now is the time to take a file or sandpaper and rough up the surface. Double check the spokes for tightness and mount the new tire. Do the same at the front, using the 3.50-21 Cheng Shin or whatever your choice of tires may be.
None of us particularly care for stock Yamaha handlebar grips, so we substituted a pair more to our liking. The stock rear view mirror should go as well, being quite vulnerable to damage and in the rider’s way. Since most enduros require street legal equipment, you will still need a mirror. Purchase one of the accessory types that are smaller and mount it as out of the way as possible.
You will not have any use for turn indicators out in the woods, so go ahead and remove the ones fitted on the 360. They come off easily, thanks to plug-in type wiring, and should you ever want to reinstall them, it’s no trouble. While we’re on the subject of removing unnecessary equipment, let’s consider the tachometer and headlight.
Anyone who has the time to look at a tachometer on the trail is riding too slow...a tach is simply an unneccessary frill on this type of machine. If you decide to remove it, you must purchase a plug that fits in the tach drive hole in the engine case. Most Yamaha dealers carry them, they’re cheap, and easy to install. But when you remove the tach on the 360, the bracket that holds it has to stay, since it also supports the speedometer and that is one item you do need in an enduro. A simple solution is to saw the bracket in half with a hacksaw, file the sharp edges and touch it up with some black spray paint.
You may also want to remove the headlight, depending on whether or not your state requires them. With these changes the bike will be a few pounds lighter up high and there is less to damage in a fall.
WHAT'S NEXT?
Some enduros may require a number plate, so for less than a buck you can get one and attach it to the handlebar crossbar. When you get your enduro entry back they will have assigned you a number. While you’re at the dealer getting the plate and the stick-on numbers, it might not be a bad idea to pick up a set of cleated footpegs and a 14 or 13-tooth countershaft sprocket. Before you find out the hard way we will tell you that rubber footpegs do not get it off-road; they have to go. When rubber gets wet it’s slippery, and boots won’t stay on the pegs. Several accessory brands are available; all you have to do is drill out the pins on the stock ones and bolt on the new set. It’s a much safer way to go.
The Yamaha 360 Enduro w^ designed for street riding as well as dirc riding. That’s why you’ll find the stock gearing on the high side and that is why you’ll need a countershaft sprocket with less teeth. We used a 14-tooth sprocket on ours initially, replacing the stock > 15-tooth item, but after the first enduro we decided one less tooth (13) would work better. And it did.
Let’s look at the approximate
amount we’ve spent so far:
Cleated Footpegs (2) .........$8.95
Rear View Mirror ............$2.95
Number Plate .................89
Handlebar Grips .............$2.50
Countershaft Sprocket ........$4.^5
Cheng Shin Knobbies (ea.) .... $20.00 TOTAL ..................$60.24
Now the question is, does $60 do the trick? Can you now run an enduro without beating yourself to death? Senior Editor Riggs entered the Turkey Enduro put on by the Fresno MC to find out. The Turkey ran around 90 miles in length and terrain varied considerably. There were downhills, uphills, rocks, muddy areas and fast forest roads.
The 360 is definitely happier with knobby tires in the dirt. It becomes much more predictable and any type of low traction situation can be attacked with much more confidence. There is really no comparison with older model Yamahas; the new version has improved that much.
The rider has complete freedom of movement in a stand-up or sit-down riding position, there’s no more of the kick starter and exhaust pipe in the leg routine. But the seat doesn’t have nearly enough padding, and if a bump catches a rider sitting off guard he’s apt to be chewing on his kidneys.
On narrow trails with numerous switchbacks the heavy machine can wear you down if you’re trying to make up time; a more leisurely pace is sometimes necessary for beginning or out of shape riders.
Riggs encountered the most difficulty on a 5-mile stretch of rocky trail that wound its way around the side of a mountain. The suspension system was not responding all that well to the rough pounding; it seemed to remain rigid for all but the big jolts. Maintaining direction was extremely difficult, and in an area where the trail’s edge had a straight drop-off down the side of a mountain, riding was no fun at all. Softer springs for the rear shocks would help here. To make matters worse, the lack of sufficient seat padding was taking its toll on our rider. Of course, if a slower pace was taken over this stretch of trail, it was no sweat. But when the rider is running a few minutes late he really has to “hook it.” The result is a rough ride.
As far as the engine went, there were no problems at all. The only preparation we undertook was the careful sealing of the magneto cover and spark plug lead with silicone to prevent any wet riding problems in stream crossings and the like. The 360 has a wonderful powerband and pulls from ultra-low rpm very strongly. We don’t think anyone wü^ feel the need to modify the engine fl® more power. This one works smoothly, quietly and reliably, so why change it? The heart of this machine pounds at a nice clip.
Aside from carefully inspecting the 360 for loose bolts and general overall integrity (servicing chain, air cleaner, cables, etc.), we did nothing. And we proved in the Turkey Enduro that for roughly $60 an owner of a new 360 Yamaha can compete competitively and fairly easily in this type of event.
If you want to improve on things even more, here’s a list of items you
may want to consider:
Heavy Duty Skid Plate .......$19.95
Lightweight Lg. Cap. Fuel Tank $60.00
D.I.D. Rims (ea.) ........ $25-30.00
Yamaha MX Front Hub ......$19.80
Fork Kit ..................$39.95
Re-padded Seat ............$20.0Q
Rear Shocks ............ $40-60.0™
Wheel Lacing ..............$40.00
As you can see, things can get fairly
expensive, but the end result would be a considerably improved motorcycle. The choice is yours—$60 or $300? Both get the job done, one just a little better. At least you get to start with an excellent basic motorcycle, the Yamaha DT360A. Have fun. |o