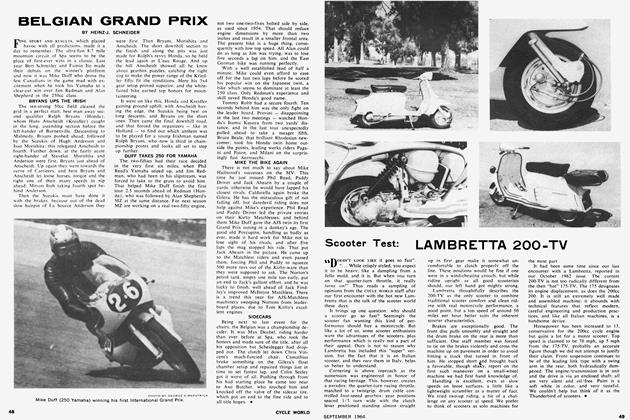
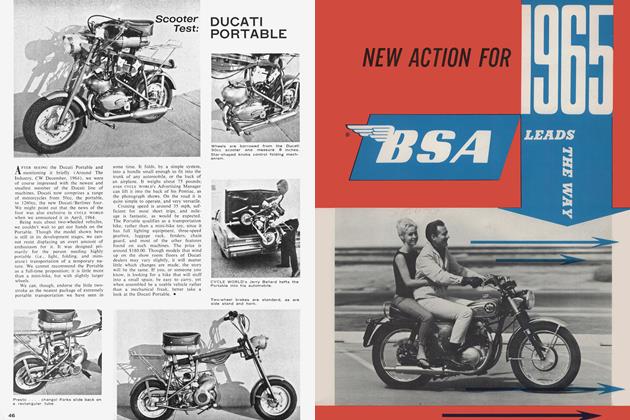
Rx For Goggles
RX FOR GOGGLES
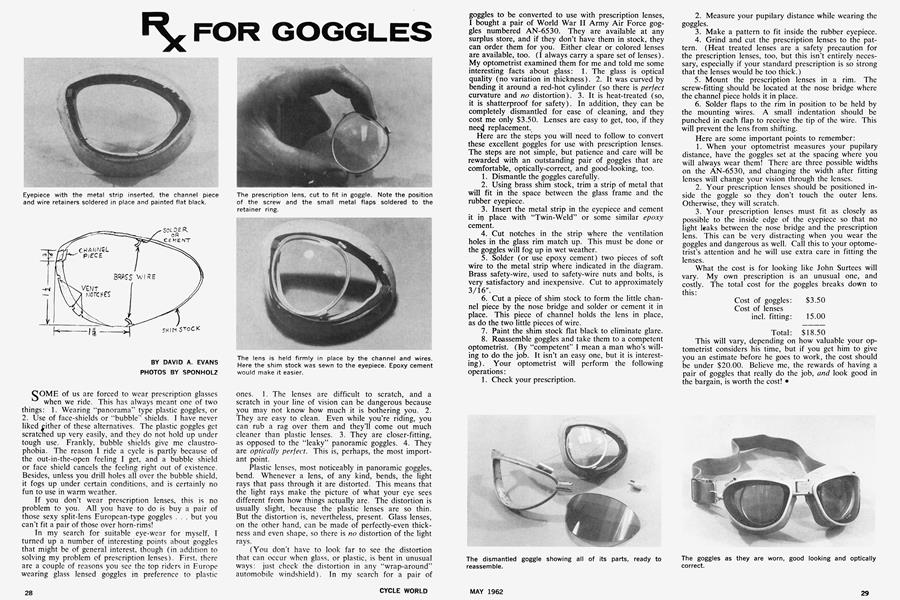
SOME of us are forced to wear prescription glasses when we ride. This has always meant one of two things: 1. Wearing "panorama" type plastic goggles, or 2. Use of face-shields or "bubble" shields. I have never liked either of these alternatives. The plastic goggles get scratched up very easily, and they do not hold up under tough use. Frankly, bubble shields give me claustrophobia. The reason I ride a cycle is partly because of the out-in-the-open feeling I get, and a bubble shield or face shield cancels the feeling right out of existence. Besides, unless you drill holes all over the bubble shield, it fogs up under certain conditions, and is certainly no fun to use in warm weather.
If you don’t wear prescription lenses, this is no problem to you. All you have to do is buy a pair of those sexy split-lens European-type goggles . . . but you can’t fit a pair of those over horn-rims!
In my search for suitable eye-wear for myself, I turned up a number of interesting points about goggles that might be of general interest, though (in addition to solving my problem of prescription lenses). First, there are a couple of reasons you see the top riders in Europe wearing glass lensed goggles in preference to plastic ones. 1. The lenses are difficult to scratch, and a scratch in your line of vision can be dangerous because you may not know how much it is bothering you. 2. They are easy to clean. Even while you’re riding, you can rub a rag over them and they'll come out much cleaner than plastic lenses. 3. They are closer-fitting, as opposed to the “leaky” panoramic goggles. 4. They are optically perfect. This is, perhaps, the most important point.
Plastic lenses, most noticeably in panoramic goggles, bend. Whenever a lens, of any kind, bends, the light rays that pass through it are distorted. This means that the light rays make the picture of what your eye sees different from how things actually are. The distortion is usually slight, because the plastic lenses are so thin. But the distortion is, nevertheless, present. Glass lenses, on the other hand, can be made of perfectly-even thickness and even shape, so there is no distortion of the light rays.
(You don't have to look far to see the distortion that can occur when glass, or plastic, is bent in unusual ways: just check the distortion in any “wrap-around” automobile windshield). In my search for a pair of
DAVID A. EVANS
goggles to be converted to use with prescription lenses, I bought a pair of World War II Army Air Force goggles numbered AN-6530. They are available at any surplus store, and if they don’t have them in stock, they can order them for you. Either clear or colored lenses are available, too. (I always carry a spare set of lenses). My optometrist examined them for me and told me some interesting facts about glass: 1. The glass is optical
quality (no variation in thickness). 2. It was curved by bending it around a red-hot cylinder (so there is perfect curvature and no distortion). 3. It is heat-treated (so, it is shatterproof for safety). In addition, they can be completely dismantled for ease of cleaning, and they cost me only $3.50. Lenses are easy to get, too, if they neecj replacement.
Here are the steps you will need to follow to convert these excellent goggles for use with prescription lenses. The steps are not simple, but patience and care will be rewarded with an outstanding pair of goggles that are comfortable, optically-correct, and good-looking, too.
1. Dismantle the goggles carefully.
2. Using brass shim stock, trim a strip of metal that will fit in the space between the glass frame and the rubber eyepiece.
3. Insert the metal strip in the eyepiece and cement it in place with “Twin-Weld” or some similar epoxy cement.
4. Cut notches in the strip where the ventilation holes in the glass rim match up. This must be done or the goggles will fog up in wet weather.
5. Solder (or use epoxy cement) two pieces of soft wire to the metal strip where indicated in the diagram. Brass safety-wire, used to safety-wire nuts and bolts, is very satisfactory and inexpensive. Cut to approximately 3/16".
6. Cut a piece of shim stock to form the little channel piece by the nose bridge and solder or cement it in place. This piece of channel holds the lens in place, as do the two little pieces of wire.
7. Paint the shim stock flat black to eliminate glare.
8. Reassemble goggles and take them to a competent optometrist. (By “competent” I mean a man who’s willing to do the job. It isn’t an easy one, but it is interesting). Your optometrist will perform the following operations :
1. Check your prescription. 2. Measure your pupilary distance while wearing the goggles.
3. Make a pattern to fit inside the rubber eyepiece.
4. Grind and cut the prescription lenses to the pattern. (Heat treated lenses are a safety precaution for the prescription lenses, too, but this isn’t entirely necessary, especially if your standard prescription is so strong that the lenses would be too thick.)
5. Mount the prescription lenses in a rim. The screw-fitting should be located at the nose bridge where the channel piece holds it in place.
6. Solder flaps to the rim in position to be held by the mounting wires. A small indentation should be punched in each flap to receive the tip of the wire. This will prevent the lens from shifting.
Here are some important points to remember:
1. When your optometrist measures your pupilary distance, have the goggles set at the spacing where you will always wear them! There are three possible widths on the AN-6530, and changing the width after fitting lenses will change your vision through the lenses.
2. Your prescription lenses should be positioned inside the goggle so they don’t touch the outer lens. Otherwise, they will scratch.
3. Your prescription lenses must fit as closely as possible to the inside edge of the eyepiece so that no light leaks between the nose bridge and the prescription lens. This can be very distracting when you wear the goggles and dangerous as well. Call this to your optometrist’s attention and he will use extra care in fitting the lenses.
What the cost is for looking like John Surtees will vary. My own prescription is an unusual one, and costly. The total cost for the goggles breaks down to this:
Cost of goggles: $3.50
Cost of lenses
incl. fitting: 15.00
Total: $18.50
This will vary, depending on how valuable your optometrist considers his time, but if you get him to give you an estimate before he goes to work, the cost should be under $20.00. Believe me, the rewards of having a pair of goggles that really do the job, and look good in the bargain, is worth the cost! •